How to set up X-VPN on Tomato routers - OpenVPN
Latest edited on 2023-09-25
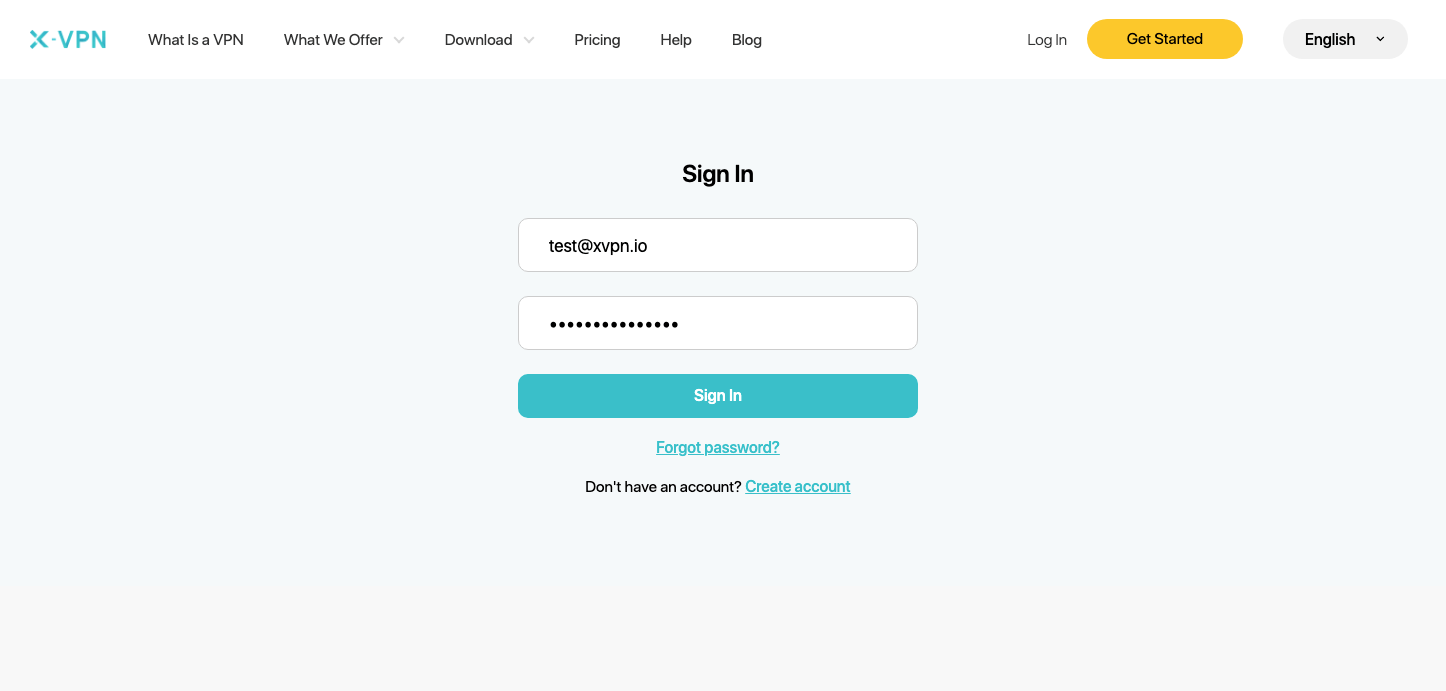
Step 1: Sign in to your X-VPN account on the website: https://xvpn.io/login
Note: Advanced configuration for Router is premium only, please make sure your account is premium.
Free users? Go premium to enjoy advanced benefits.
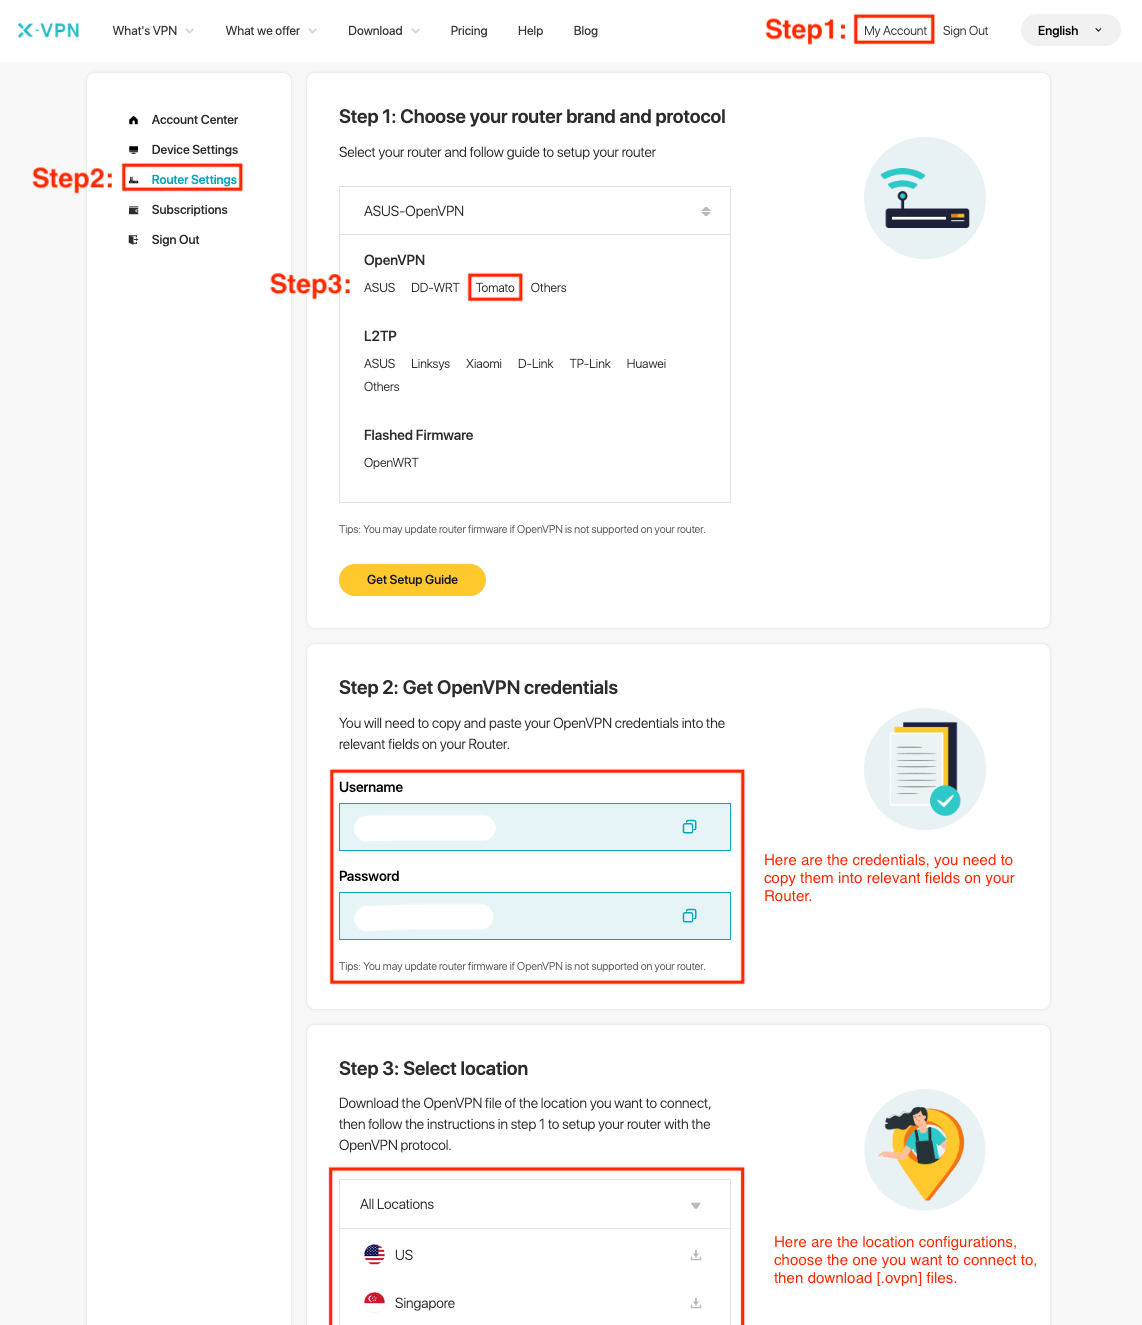
Step 2: Get your OpenVPN credentials and location configuration
Go to My Account > Router Settings > Choose "Tomato" under OpenVPN, then get credentials (username and Password ) and location configuration.
If you are setting up the Router for the first time, you will see the following page when you click Router Settings: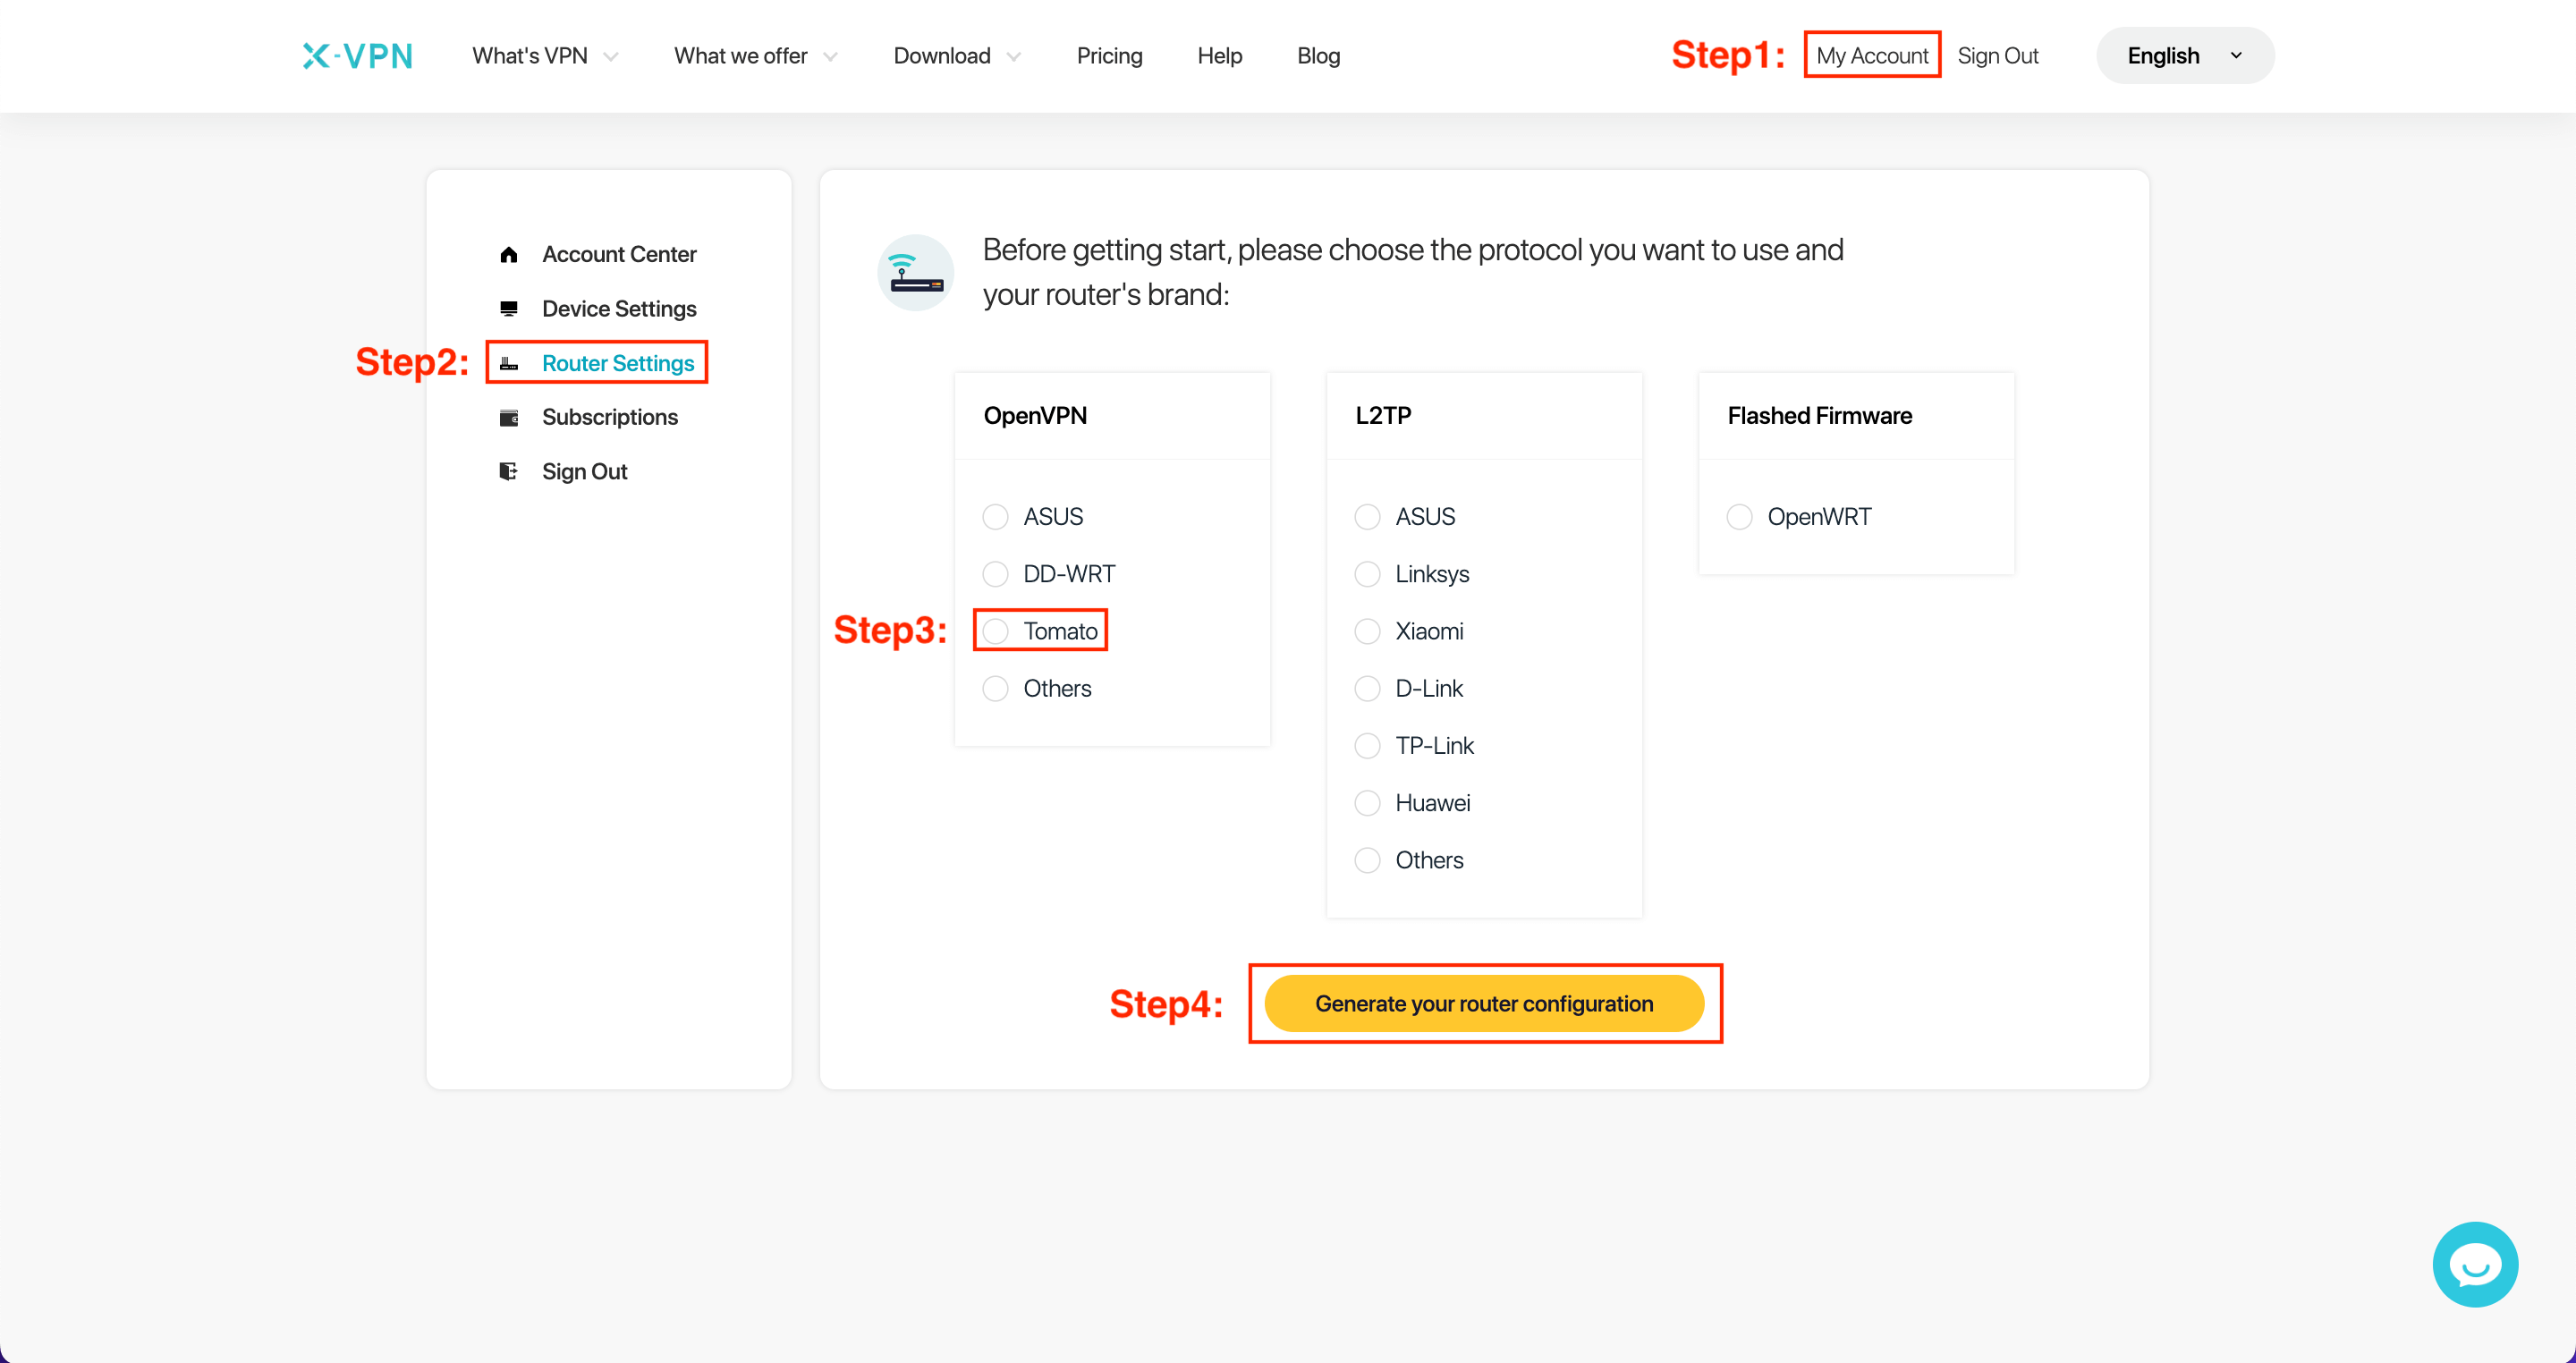 Choose "Tomato" under OpenVPN > Tap "Generate your router configuration", then you can get to the Router Settings page as we mentioned above.
Step 3: Sign in to your router account
Open your Tomato router control panel on a new tab/page: enter the IP address of your router - http://192.168.1.1/, by default. Also, you can find your router's default gateway here.
The username and password are "admin" by default unless you've changed it. You can find the logins on the label at the bottom of the router as well.
Step 4: Configure Basic information of the OpenVPN client
Navigate to "VPN Tunneling" > "OpenVPN Client" > "Basic"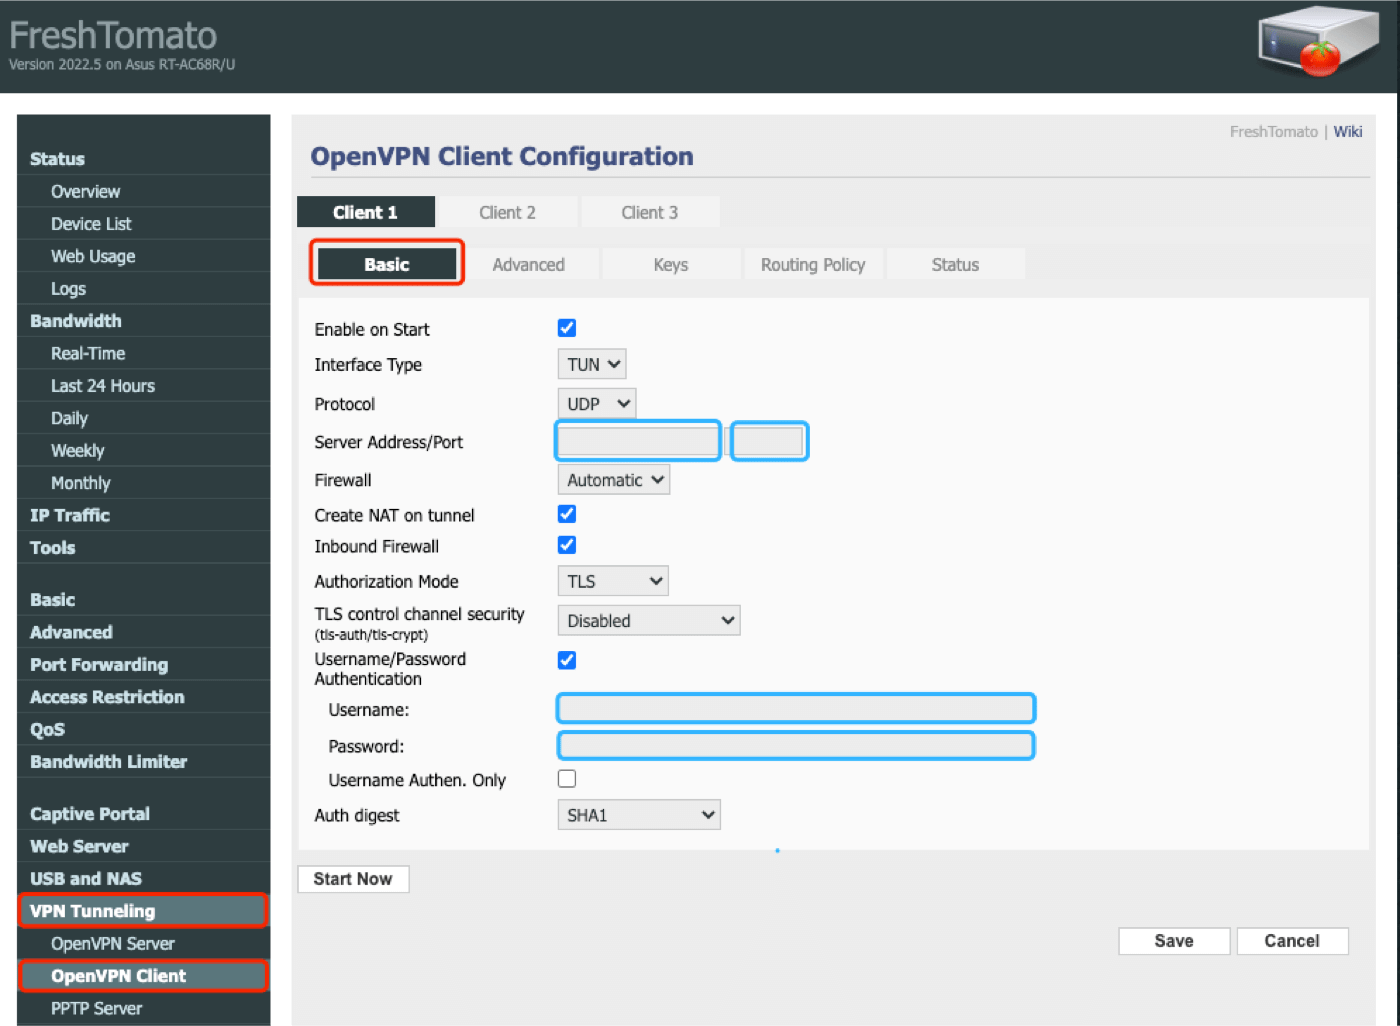 Configure as follows:
Enable on Start: Check if you want to run OpenVPN at Router start up
Interface Type: TUN
Protocol: UDP
Server Address/Port: Find in [.ovpn] file you download in Step 2
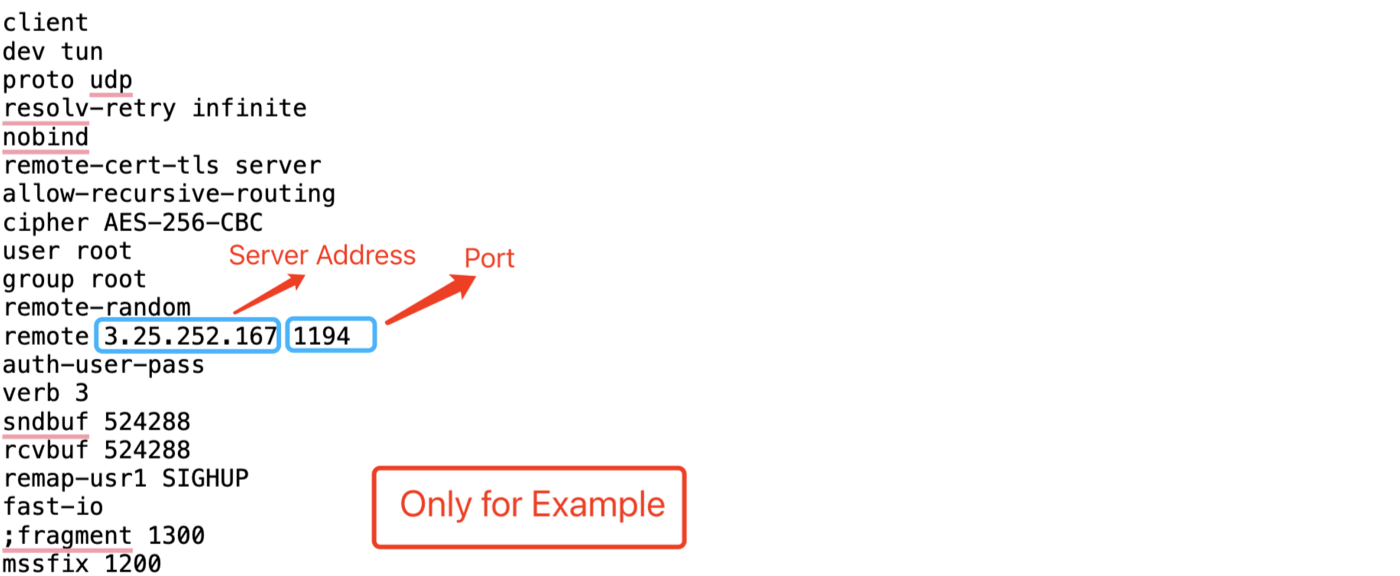 [.ovpn] file example
Firewall: Automatic
Create NAT on tunnel: Check
Inbound Firewall: Check
Authorization Mode: TLS
TLS control channel: Disable
Username/Password Authentication: Check. Enter Username and Password you got in Step 2
Auth digest: SHA1
Well done! Then to the next step.
Step 5: Configure Advanced information of the OpenVPN client
Navigate to "VPN Tunneling" > "OpenVPN Client" > "Advanced"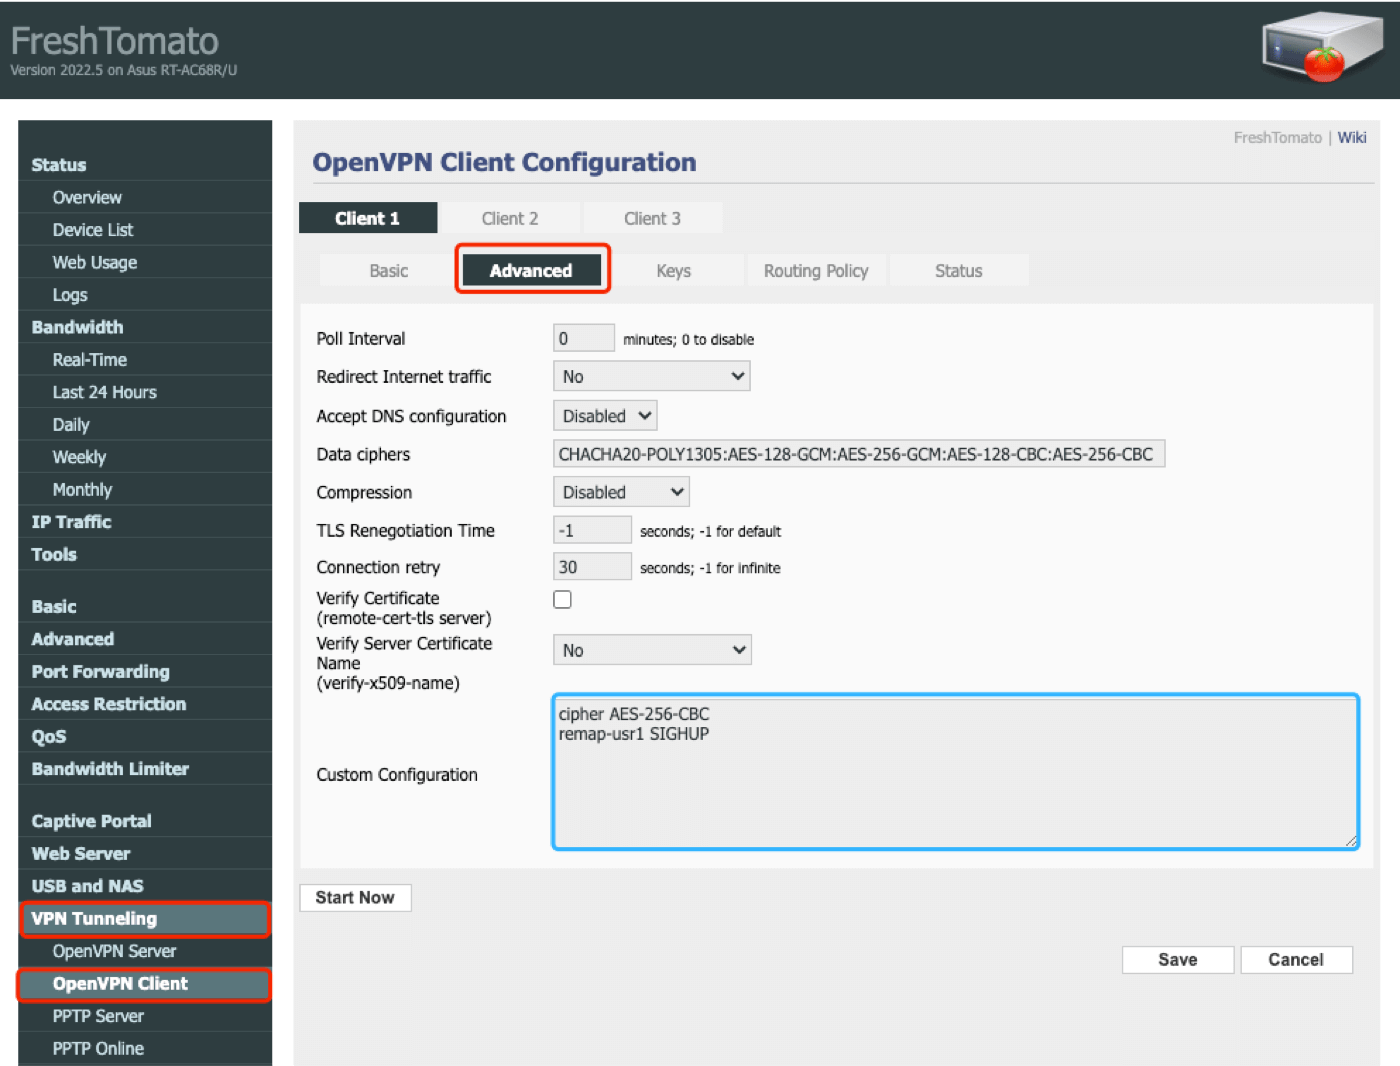 Configure as follows:
Poll interval: 0
Redirect Internet traffic: No
Accept DNS configuration: Disable
Data ciphers: Use Default, if empty, enter: CHACHA20-POLY1305:AES-128-GCM:AES-256-GCM:AES-128-CBC:AES-256-CBC
Compression: Disable
TLS Renegotiation Time: -1
Connection retry: 30
Verify Certificate: Unchecked
Verify Server Certificate: No
Custom Configuration:
cipher AES-256-CBC
remap-usr1 SIGHUP
Well done! Then to the next step.
Step 6: Configure the Keys information of the OpenVPN client
Navigate to "VPN Tunneling" > "OpenVPN Client" > "Keys"
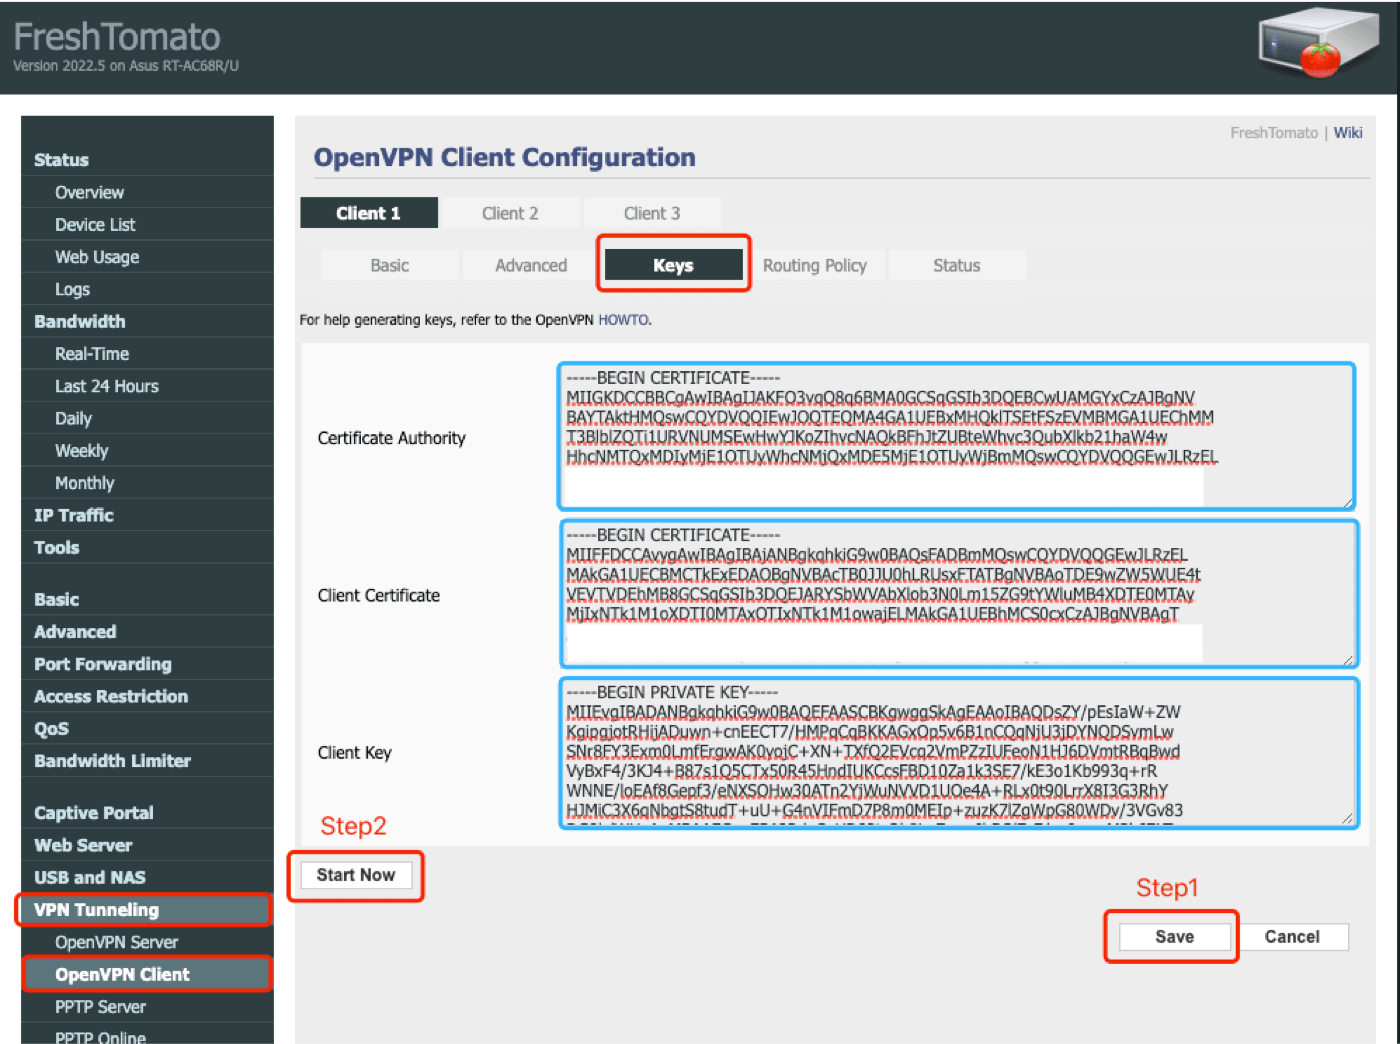
Configure "keys" fields with content in the [.ovpn] file you download in Step2:
- Copy the certificate and paste it into Certificate Authority
- Copy the certificate and paste it into Client Certificate
- Copy the certificate and paste it into Client Key
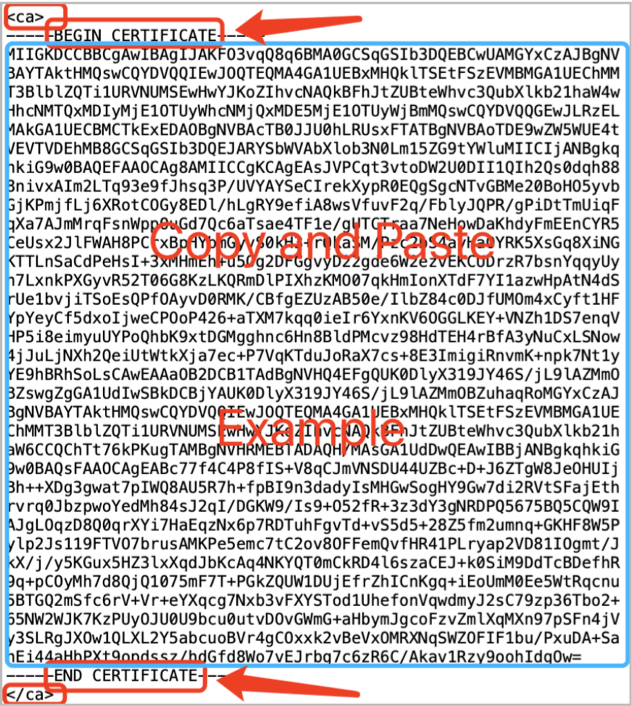
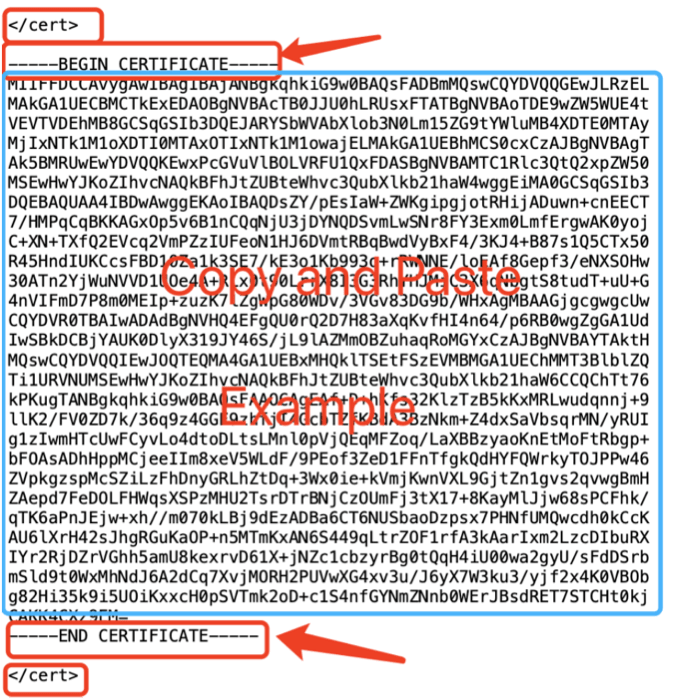
Certificate Authority in [.ovpn] file Client Certificate in [.ovpn] file
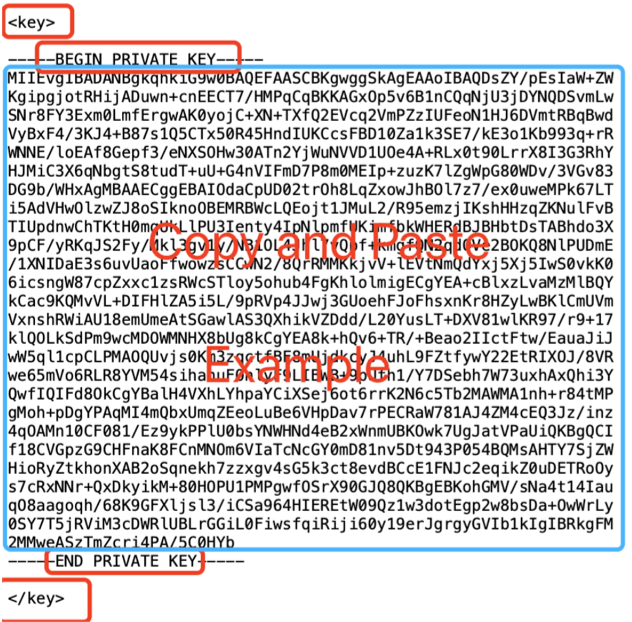
Client Key in [.ovpn] file
Well done! Click "Save" to save configuration, then click " Start Now" to boot OpenVPN, it may take some time.
Step 7: Check the connection and know how to disconnect
Navigate to "VPN Tunneling" > "OpenVPN Client" > "Status", if the values are changing, the OpenVPN is connected. Also, You may visit this site to verify that your IP address has changed!
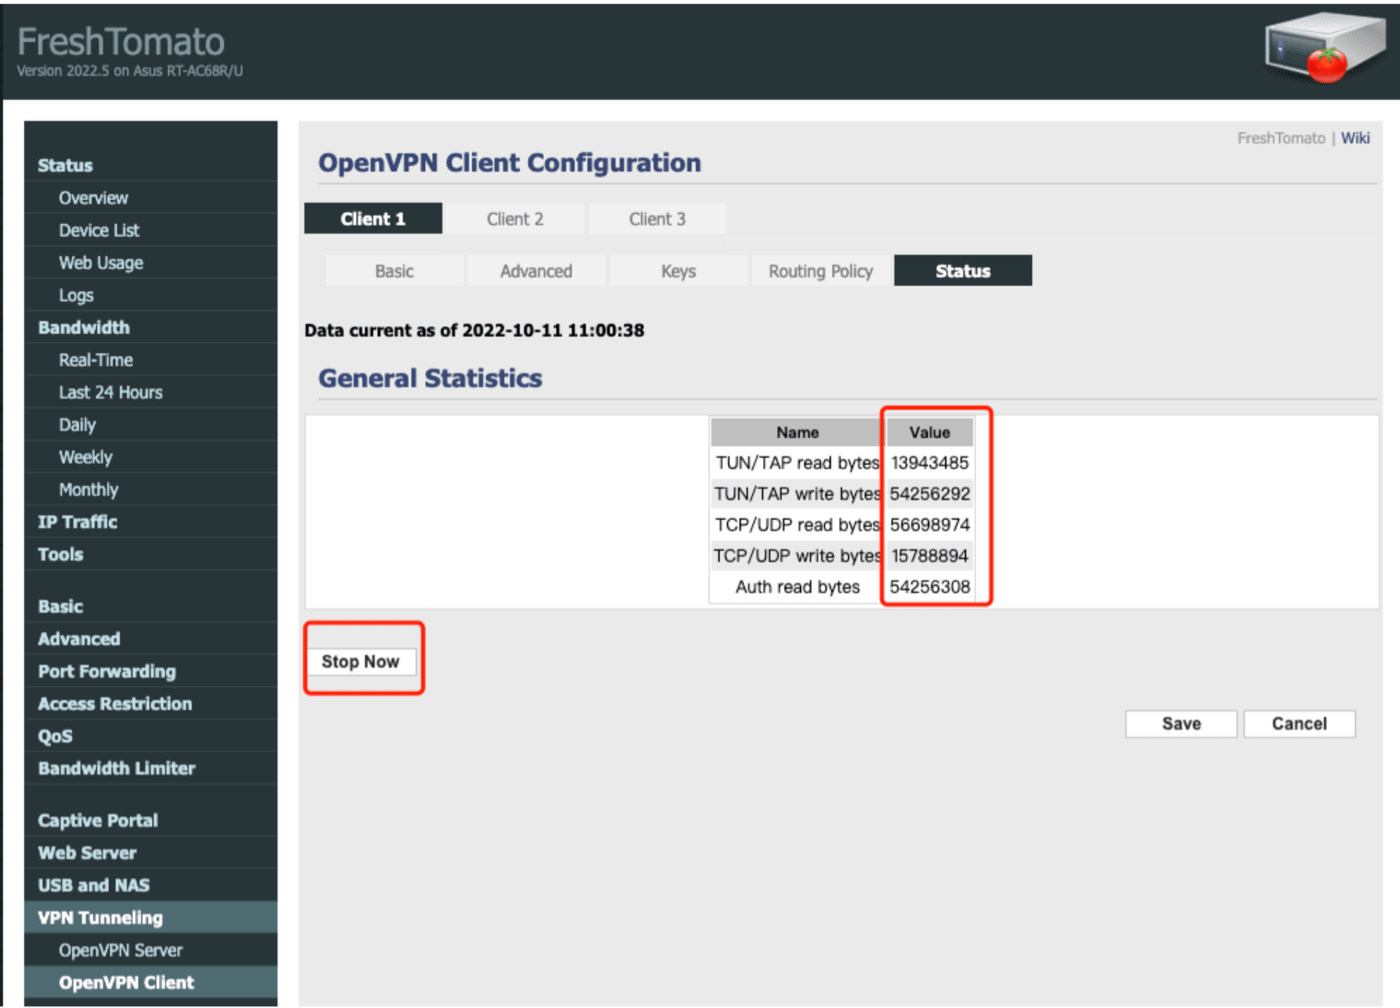
If you want to disconnect X-VPN, select "Stop Now"!
Step 8: Check and configure DNS.
Go to"Basic > "Network" Make sure the DNS server is not blocked, you may fill DNS1 and DNS2 servers with the following open-source DNS servers:
8.8.8.8
8.8.4.4
208.67.222.222
208.67.222.220
8.26.56.26
8.20.2247.20
209.244.0.3
208.244.0.4
Then click "Save" at the bottom of the page! Well done, you are all set!
Was this article helpful?
Thanks for your feedback!
Why wasn't this article helpful?