How to set up X-VPN on DD-WRT routers - OpenVPN
Ultima modifica il 2026-04-14
Step 1: Sign in to your X-VPN account on the website: https://xvpn.io/login
Note: Advanced configuration for Router is premium only, please make sure your account is premium.
Free users? Go premium to enjoy advanced benefits.
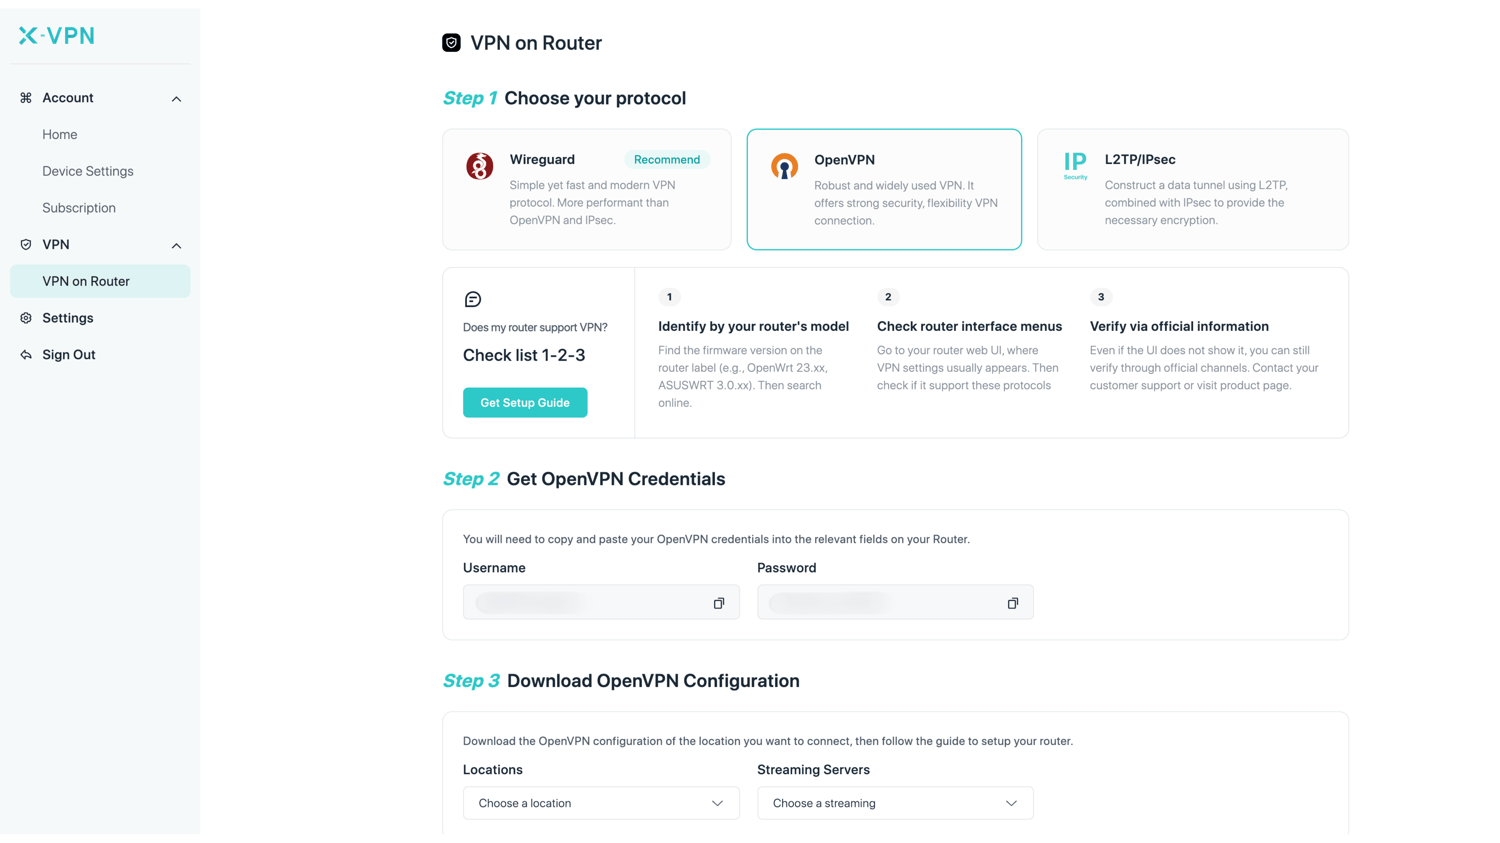
Step 2: Get your OpenVPN credentials and location configuration
Go to My Account > VPN > VPN on Router, choose OpenVPN, then get credentials (username and Password ) and location configuration.
You need to copy the OpenVPN credentials into relevant fields on your Router, and choose the location configuration you want to connect to, then download the files.
Step 3: Sign in to your DD-WRT account
Open the DD-WRT router control panel on a new tab/page: enter the IP address of your router - http://192.168.1.1/, by default. Also, you can find your router's default gateway here.
Configure as follows:
Start OpenVPN Client: Enable
CVE-2019-14899 Mitigation: Enable
Server IP/Name &Port: Find in [.ovpn] file you download in Step 2
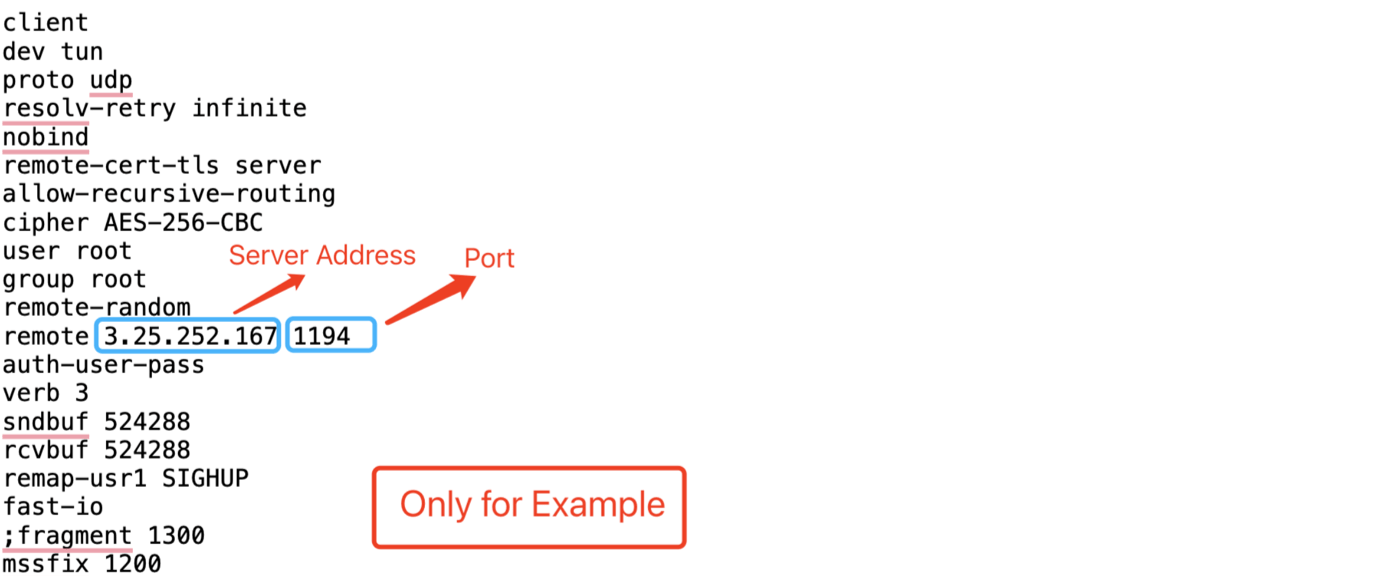
[.ovpn] file example
Tunnel Device: TUN
Tunnel Protocol: UDP
Encryption Cipher: AES-256-CBC
Hash Algorithm: SHA1
First Data Cipher: AES-256-CBC
Second Data Cipher: AES-256-GCM
Third Data Cipher: AES-128-CBC
User Pass Authentication: Enable
Username & Password: Enter Username and Password you got in Step 2
Advanced Options: Enable
TLS Cipher: None
Compression: Disabled
NAT: Enable
Inbound Firewall on TUN: Check
IP Address: -
Subnet Mask: -
Tunnel MTU setting: Default
Tunnel UDP Fragment: -
Tunnel UDP MSS-Fix: Disable
Verify Server Cert: Uncheck
TLS Key choice: TLS Auth
TLS Key: -
Additional Config: -
policy based Routing: -
PKCS12 Key: -
Static Key: -
Configure the following three "keys" fields with content in the [.ovpn] file you download in Step2:
Copy the certificate and paste it into Certificate Authority
Copy the certificate and paste it into Client Certificate
Copy the certificate and paste it into Client Key

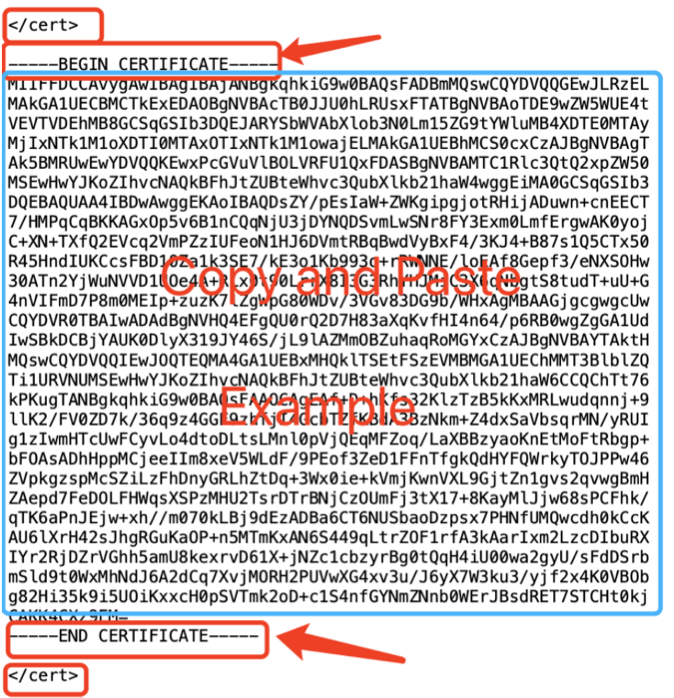
Certificate Authority in [.ovpn] file Client Certificate in [.ovpn] file
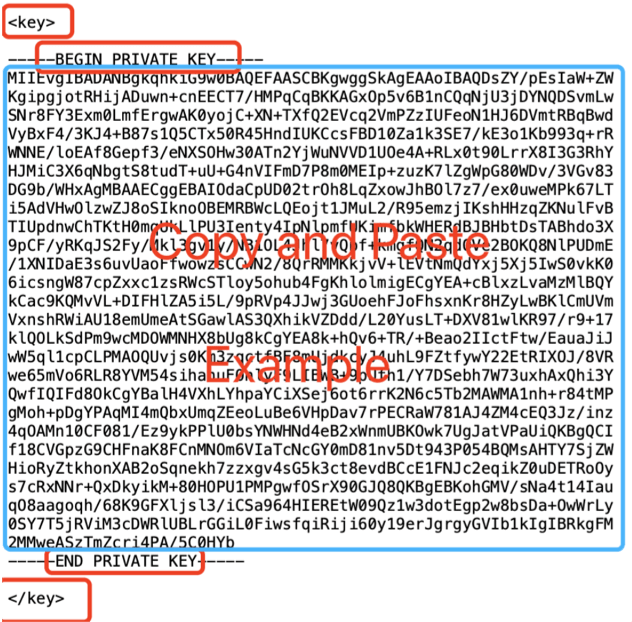
Client Key in [.ovpn] file
SoftEther VPN
Server: Disable
Bridge: Disable
Client: Disable
Config: -
Well done! Click "Save" to save the configuration, then click "Apply Settings".
Step 5: Check and configure DNS
Navigate to "Setup > "Basic Setup"
Make sure the DNS server is not blocked, you may fill following DNS servers in the Static DNS 1/2/3 field, filling each one with a different DNS Server:
8.8.8.8
8.8.4.4
208.67.222.222
208.67.222.220
8.26.56.26
8.20.2247.20
209.244.0.3
208.244.0.4
Then click "Save" & "Apply Settings" at the bottom of the page! You are all set now!
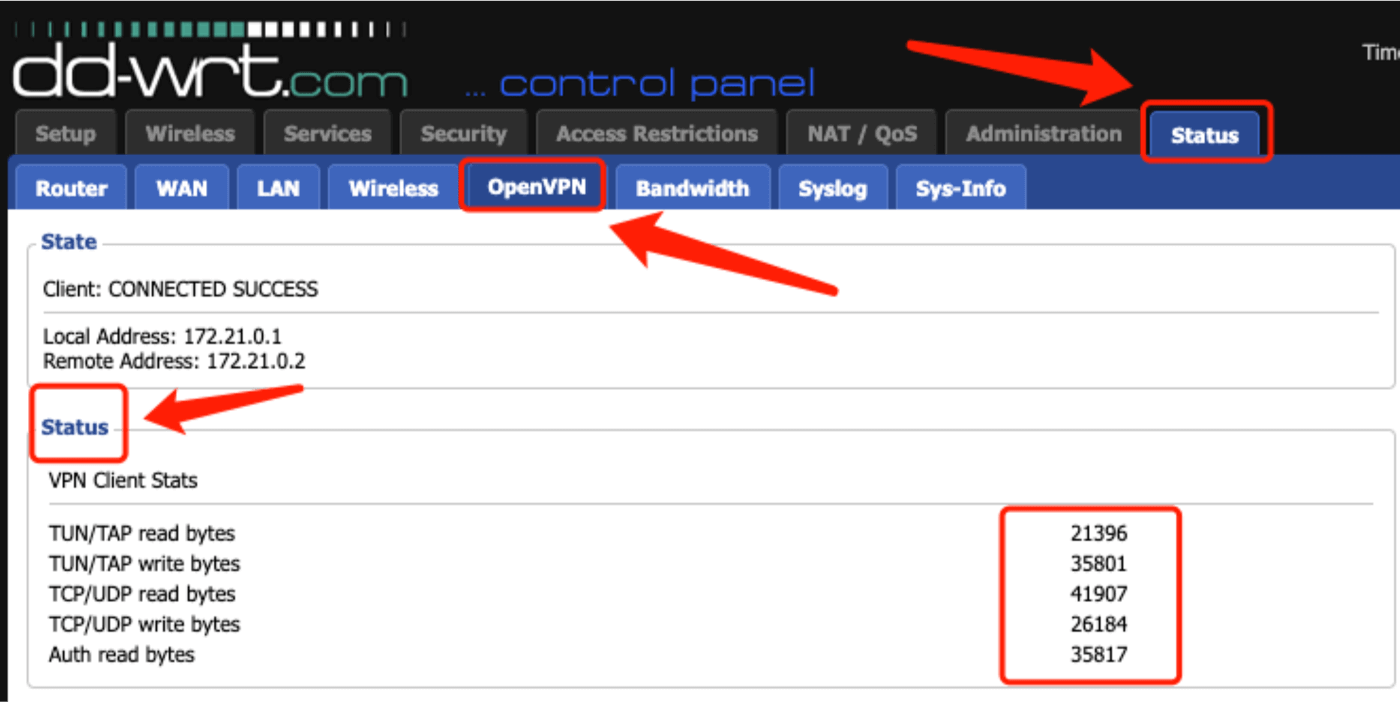
Step 6: Reboot your router to connect
Reboot your router and wait for a minute or two for everything to settle, then check the status of the OpenVPN client in "Status" > "OpenVPN", if the values are not zero, the OpenVPN is connected. Also, You may visit this site to verify that your IP address has changed!
Questo articolo è stato utile?
Grazie per il tuo feedback!
Perché questo articolo non è stato utile?