How to set up DNS on different browsers?
Ultima modifica il 2026-09-04
If you are using X-VPN and find your DNS IP address has not changed compared to when you were not connected, it could be due to your browser's DNS settings. When using X-VPN, your DNS requests will go through X-VPN's private DNS servers. However, in a browser, you can set up your own DNS server or a third-party DNS server. Once set, the DNS requests in your browser will go through the specified server, rather than X-VPN's DNS servers. This can result in consistent DNS IP addresses before and after connecting to X-VPN.
Our step-by-step guide will help you check if your DNS settings are bypassing the VPN's protective shield.
How to set up DNS on different browsers to get VPN protection?
❑ Chrome settings:
Go to Settings in the up-right corner, and choose Privacy and Security->Security->Advanced->Use secure DNS.
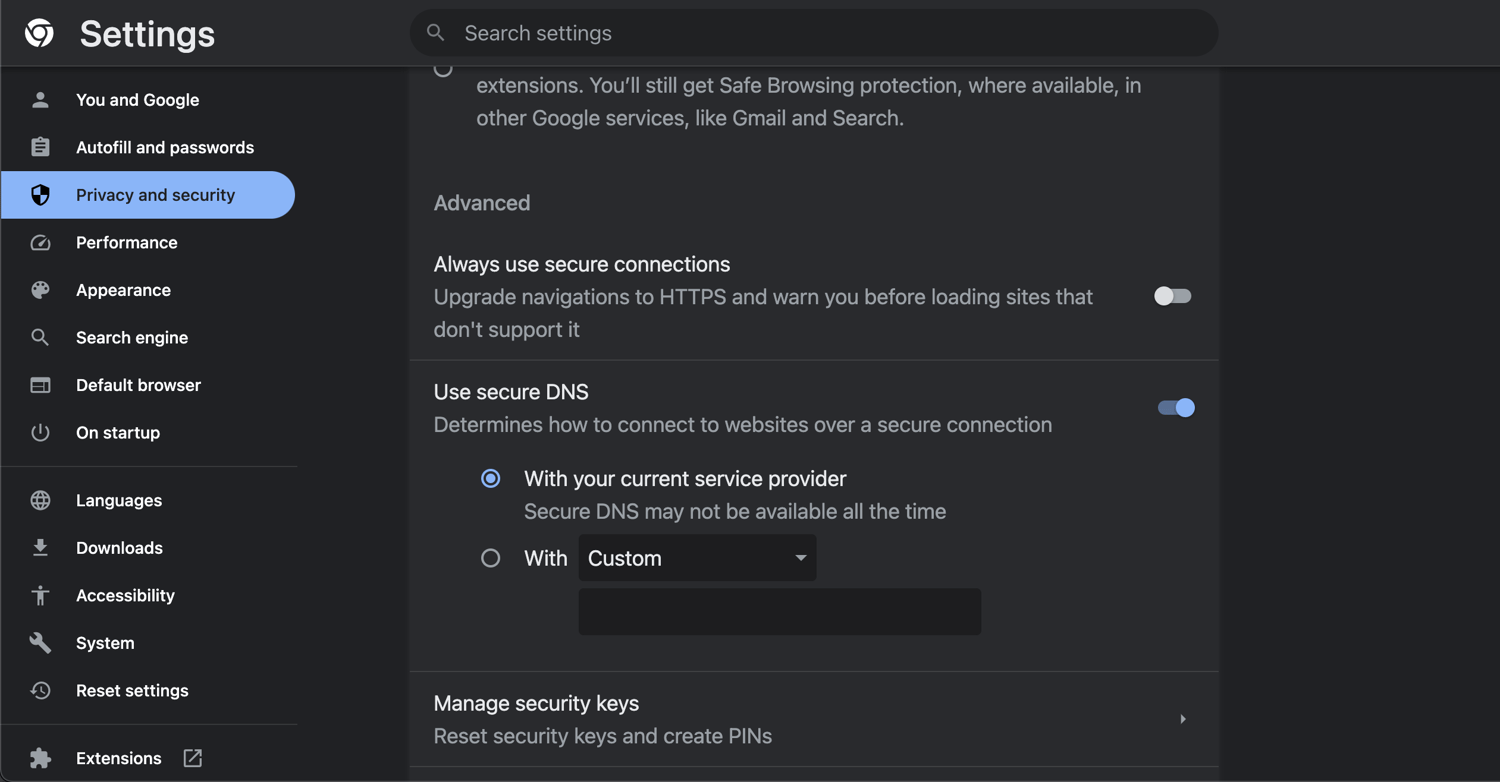
1. If you select [With Custom], you can choose from four different DNS servers (CleanBrowsing, Cloudflare, Google, and OpenDNS) or enter a DNS server you’d like to use. If you use any of the four servers, your DNS request will bypass X-VPN's protection and go through the one you choose.
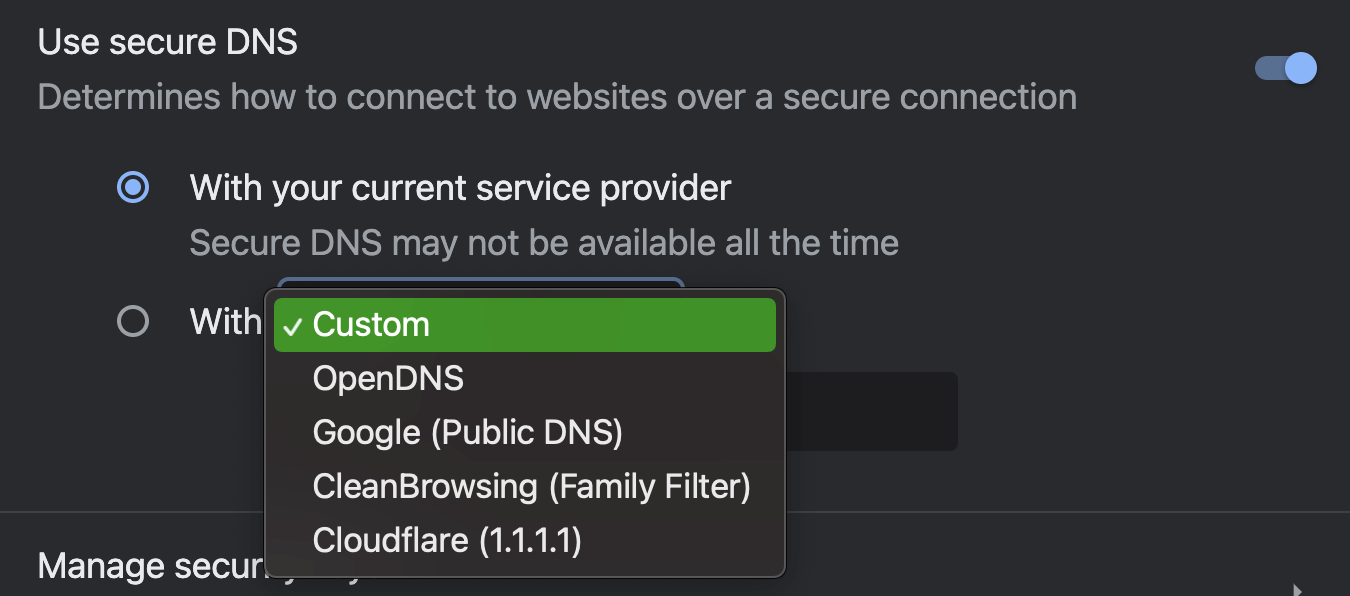
2. If you select [With your current service provider], it means that when you connect to X-VPN, your DNS requests go through X-VPN’s DNS server.
In order to get better protection from X-VPN, we recommend selecting [With your current service provider].
❑ Firefox settings:
Go to Settings in the upper-right corner, then choose Privacy & Security → DNS over HTTPS.
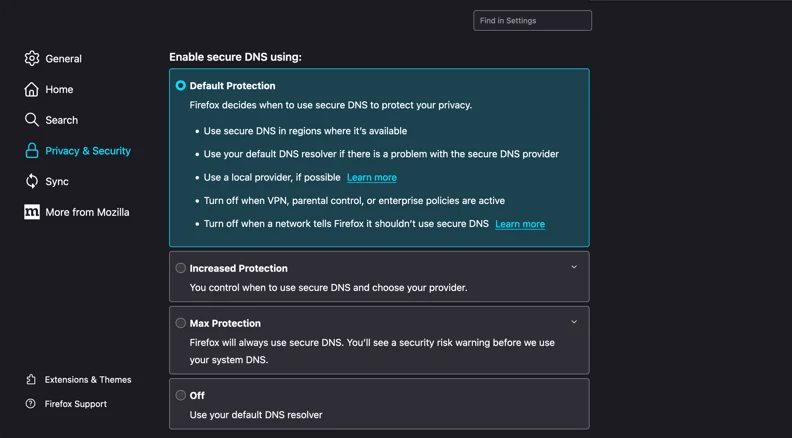
Firefox currently provides several DNS over HTTPS protection levels, including Default Protection, Increased Protection, Max Protection, Custom Protection, and Off.
1. If you choose Increased Protection, Max Protection, or Custom Protection, Firefox may prioritize the DNS over HTTPS provider you selected instead of using the DNS settings provided by your system or VPN connection.
2. If you choose Default Protection, Firefox automatically decides when to use DNS over HTTPS. In some situations, such as when a VPN is detected, Firefox may use the system's default DNS resolver instead.
3. If you choose Off, Firefox will use the system's default DNS resolver. When X-VPN is connected, this allows Firefox to use the DNS configuration provided through the VPN connection.
To reduce the chance that browser-level DNS settings bypass the DNS configuration provided by X-VPN, we recommend using Default Protection or Off while connected to X-VPN.
❑ Microsoft Edge settings:
Go to Settings in the up-right corner, and choose Privacy, Search, Service->Security->Use secure DNS to specify how to look up the network address for websites.
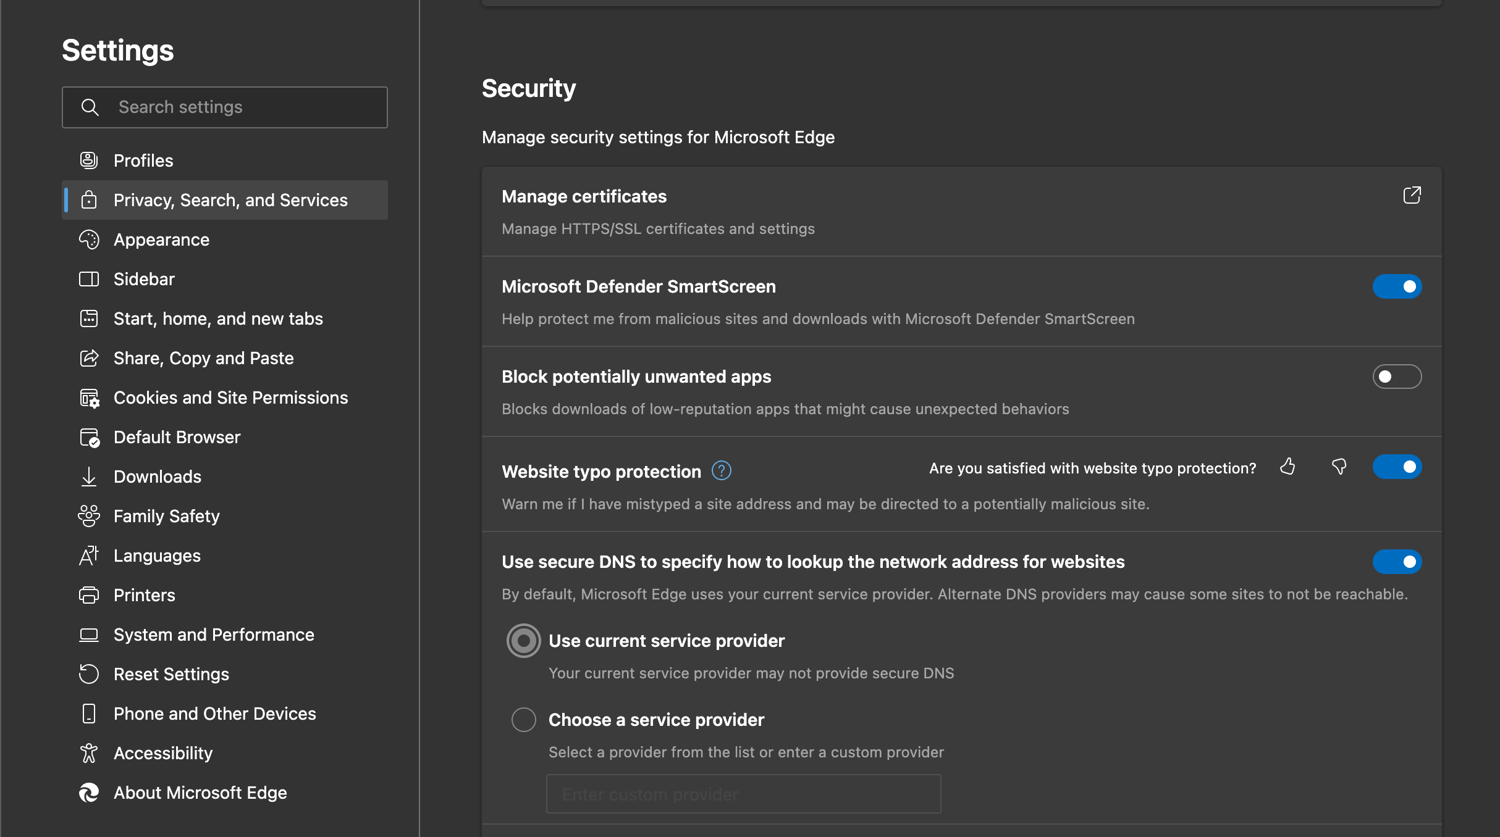
1. If you select [Choose a service provider], you can choose from four different DNS servers (Cloudflare, OpenDNS, CleanBrowsing, and Google) or enter a DNS server you’d like to use. If you use any of the four servers, your DNS request will bypass X-VPN's protection and go through the one you choose.
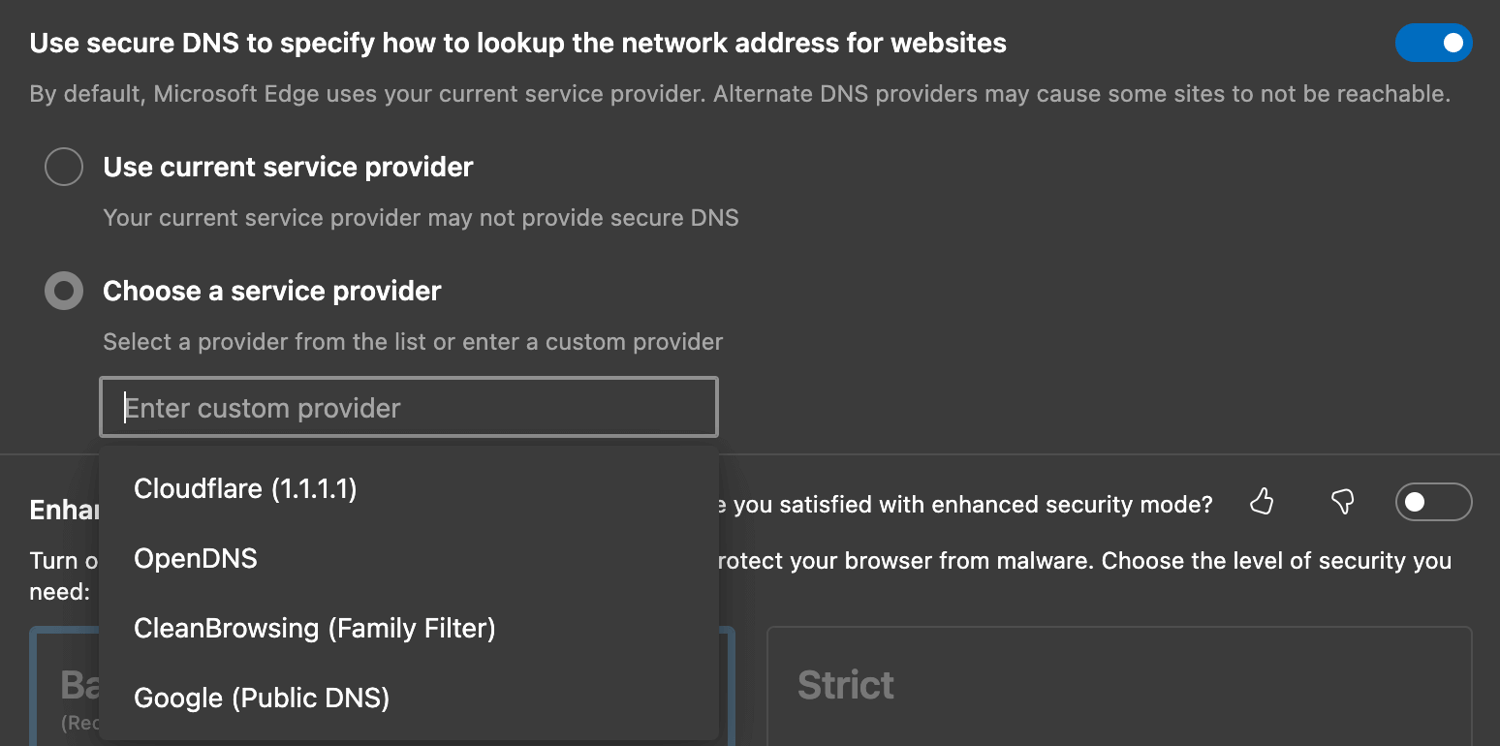
2. If you select [Use current service provider], it means that when you connect to X-VPN, your DNS requests go through X-VPN’s DNS server.
In order to get better protection from X-VPN, we recommend selecting [Use current service provider]
❑ Brave settings:
Go to Settings in the up-right corner, and choose Privacy and Security ->Advanced->Use secure DNS.
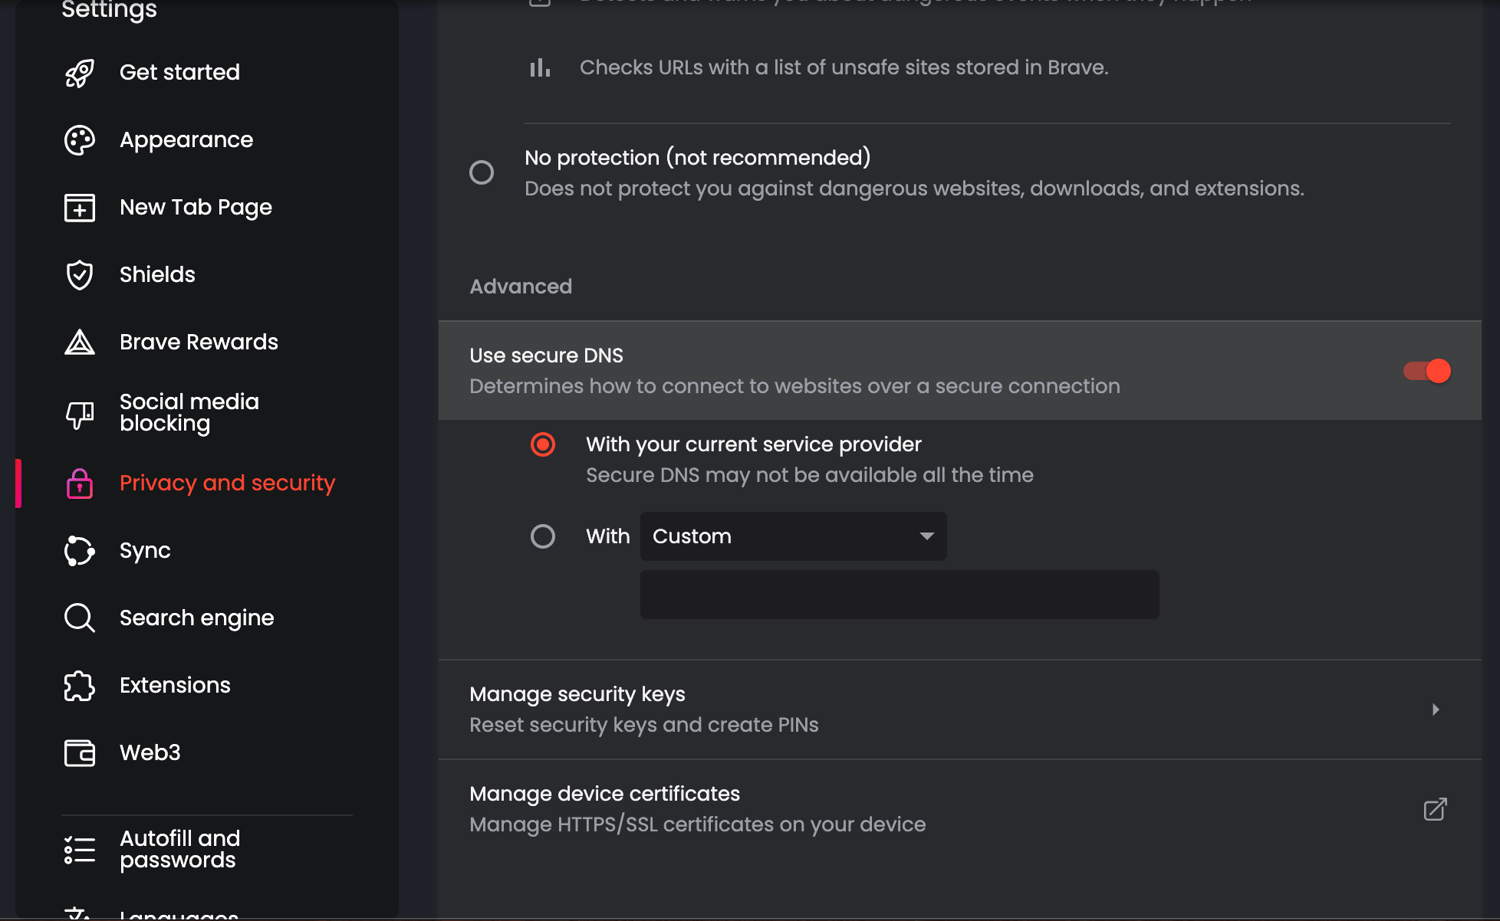
1. If you select [With Custom], you can choose from four different DNS servers (Google, CleanBrowsing, OpenDNS, and Cloudflare) or enter a DNS server you’d like to use. If you use any of the four servers, your DNS request will bypass X-VPN's protection and go through the one you choose.
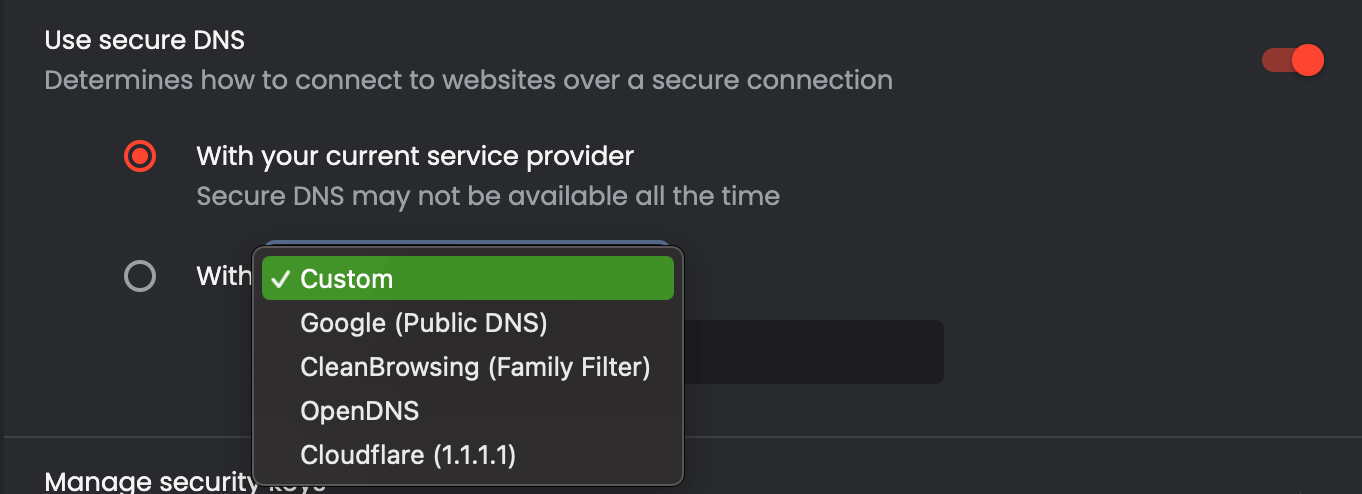
2. If you select [With your current service provider], it means that when you connect to X-VPN, your DNS requests go through X-VPN’s DNS server.
In order to get better protection from X-VPN, we recommend selecting [With your current service provider].
You can now use this guide to check the security and privacy settings of your frequently used browsers. By doing so, you can ensure that X-VPN provides the utmost protection for your online privacy. Follow these steps to optimize your browser settings and enhance your security with X-VPN.
Questo articolo è stato utile?
Grazie per il tuo feedback!
Perché questo articolo non è stato utile?