How to Enable Static IP with X-VPN?
Latest edited on 2026-09-04
The static IP feature is only available on iOS and Android devices with premium subscription. And what X-VPN offer is not dedicated IP but shared static IP.
Setting up a static IP with X-VPN is a breeze. Here's how:
Step1: Download and Install X-VPN
Download the X-VPN app from your app store or official website, install it on your iOS or Android device. Check step by step guide for the X-VPN set up:
How to set up X-VPN on iOS devices-iPhone and iPad?
How to set up X-VPN/Android APK on Android devices?
Step2: Launch the App and Choose Your Plan
Choose a monthly or yearly subscription of X-VPN. Enjoy a 7-day free trial without payment. If you are not satisfied with the premium service, you can cancel it in 30 days.
Step3: Find Static IP Feature
Find the static IP feature in Me page > VPN Settings > Static IP.
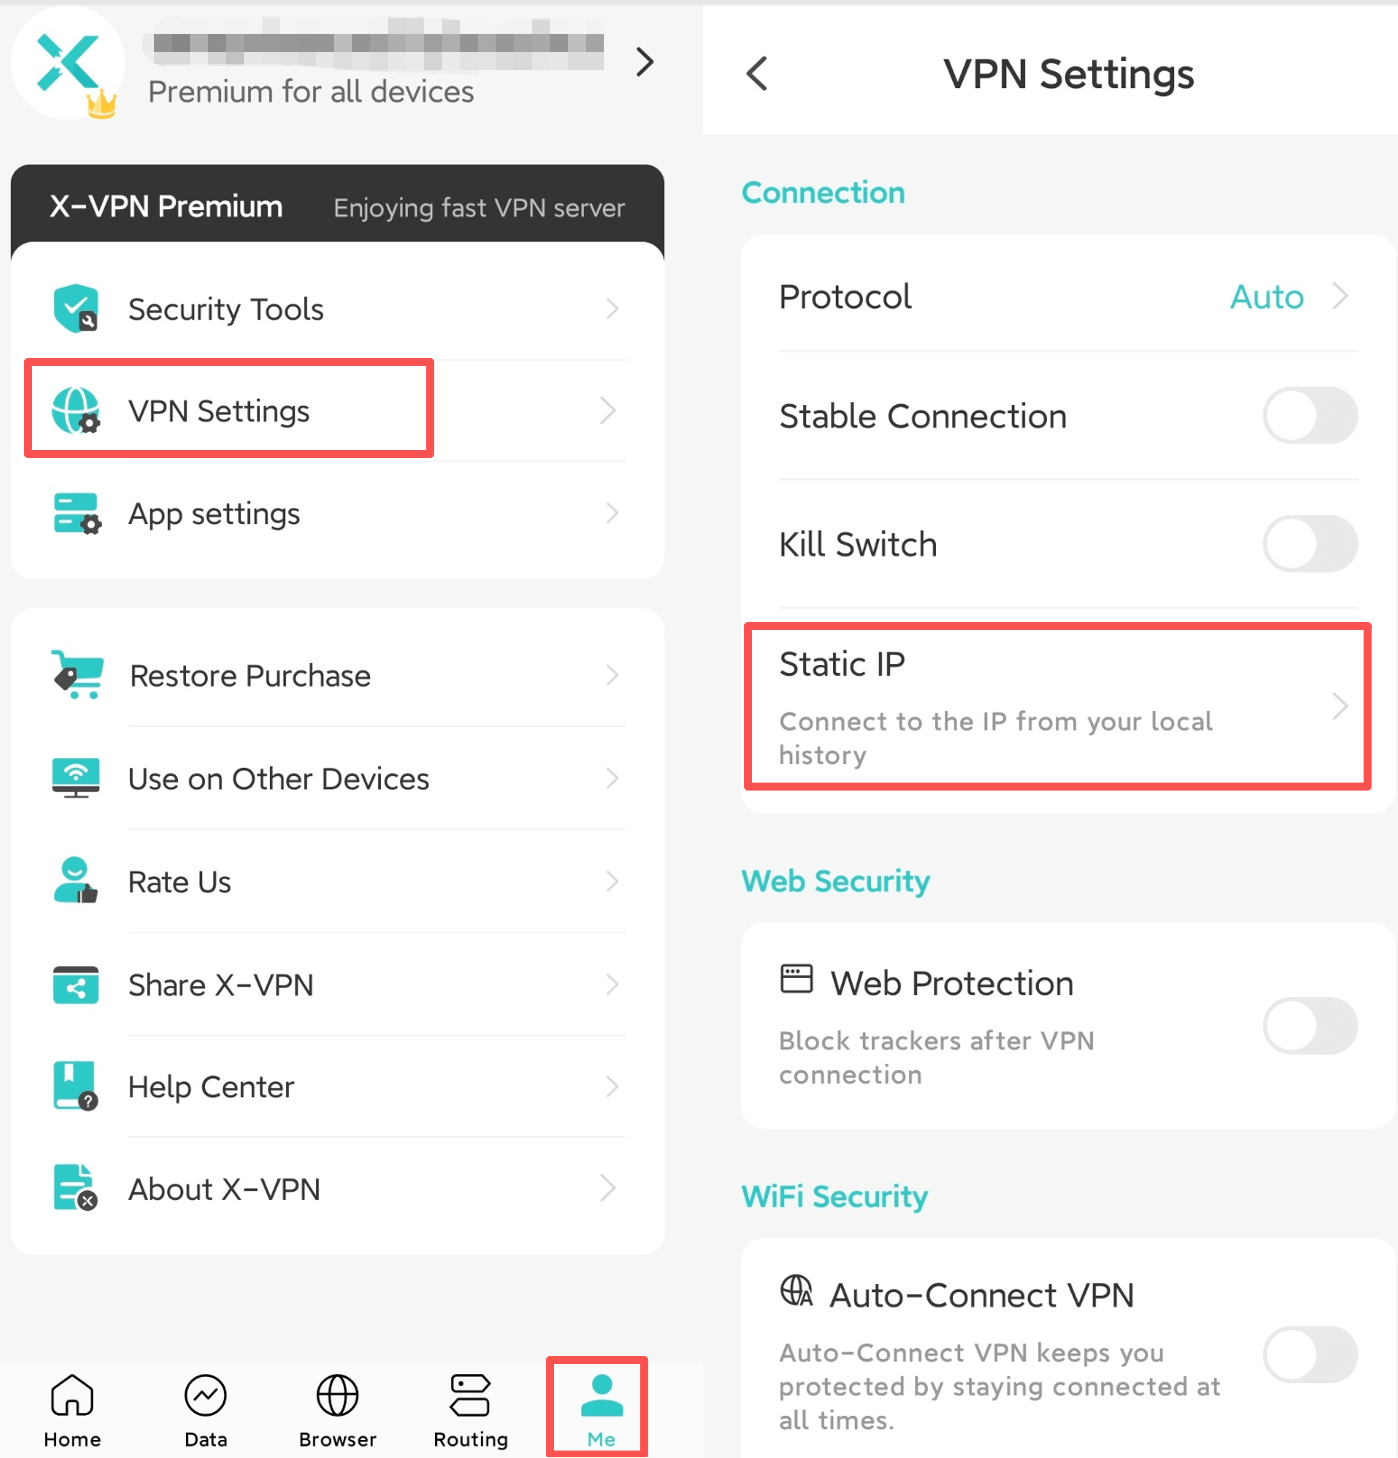
Step3: Find Static IP Feature
Step4: Choose a Static IP
You will find the IP you are connecting and have connected before. You can connect to the configuration which its status shows "Work". If you don’t find one in your IP list, get back to the homepage and choose your prefer location in the server list and connect. You will get a new choice on the list.
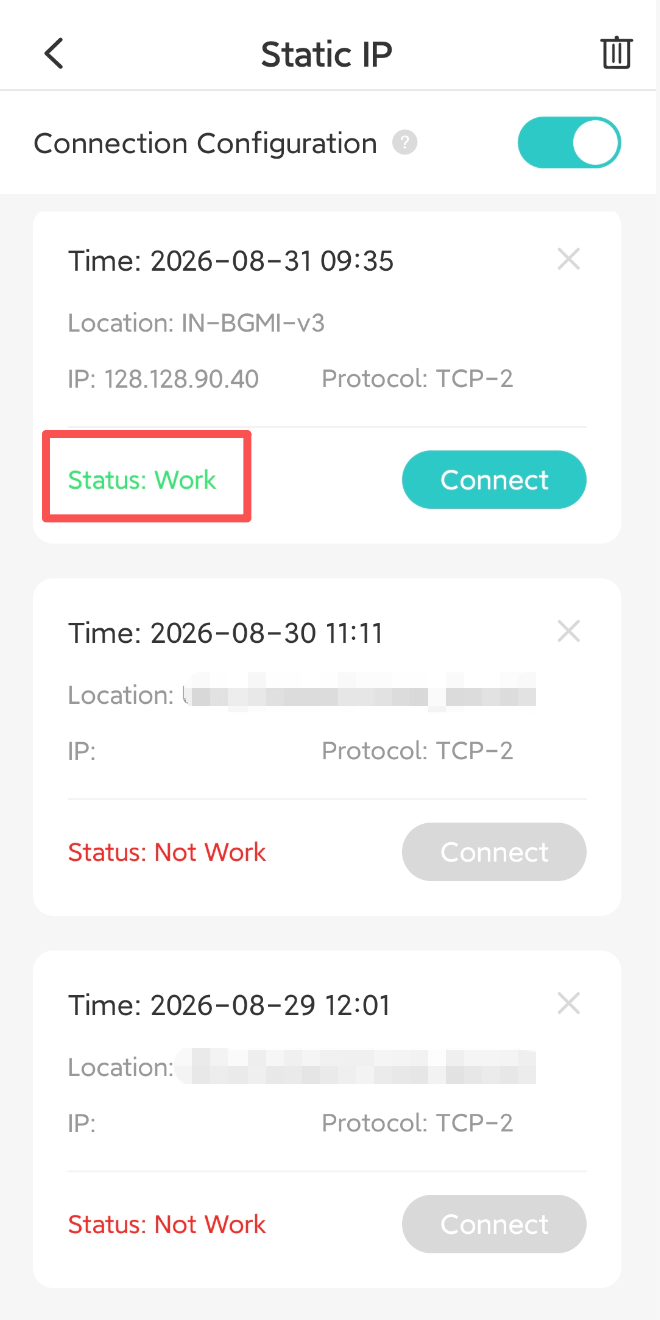
Step4: Choose a Static IP
And voila! You now have secured, unlimited access to a stable internet experience.
Was this article helpful?
Thanks for your feedback!
Why wasn't this article helpful?