How to set up X-VPN on Apple TV?
Latest edited on 2023-10-18
This tutorial will show you how to install and try out X-VPN on Apple TV.
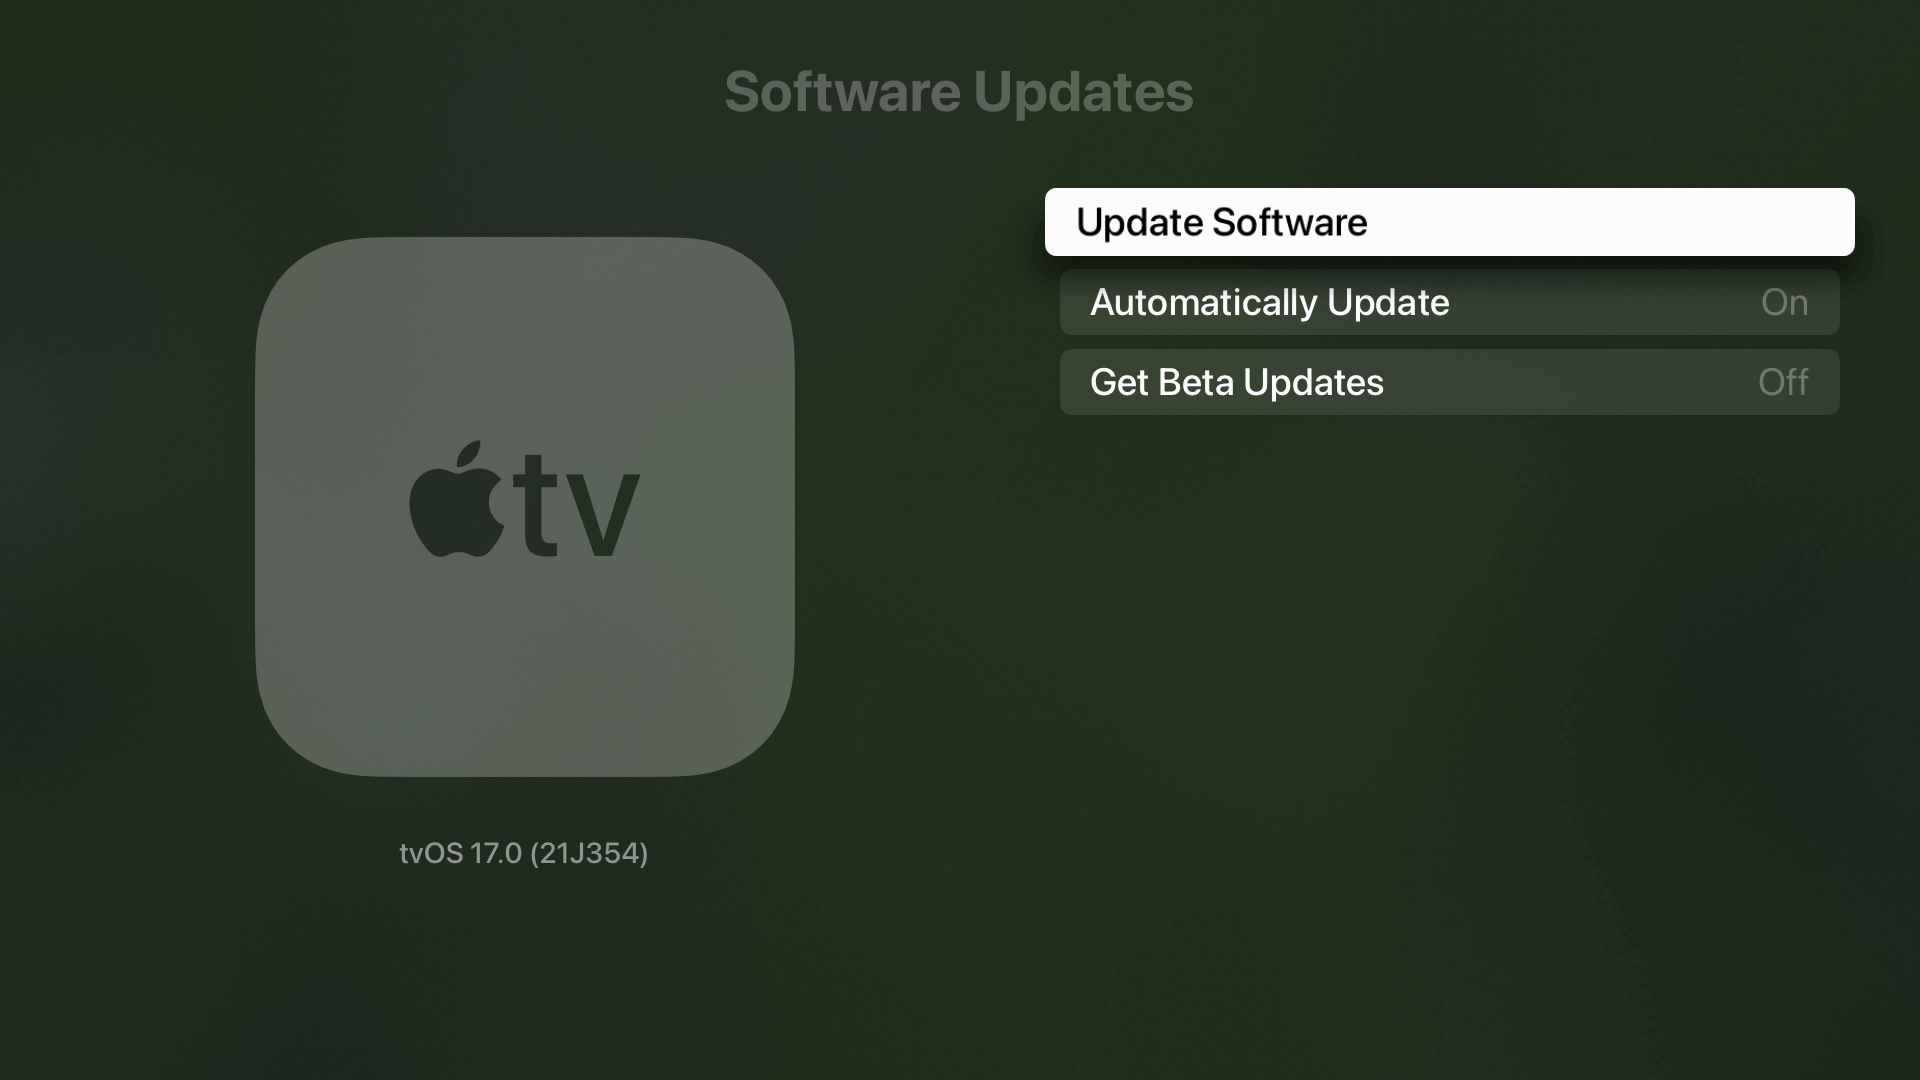
1. Make sure you've upgraded your system to tvOS17.
2. Search X-VPN in the App Store
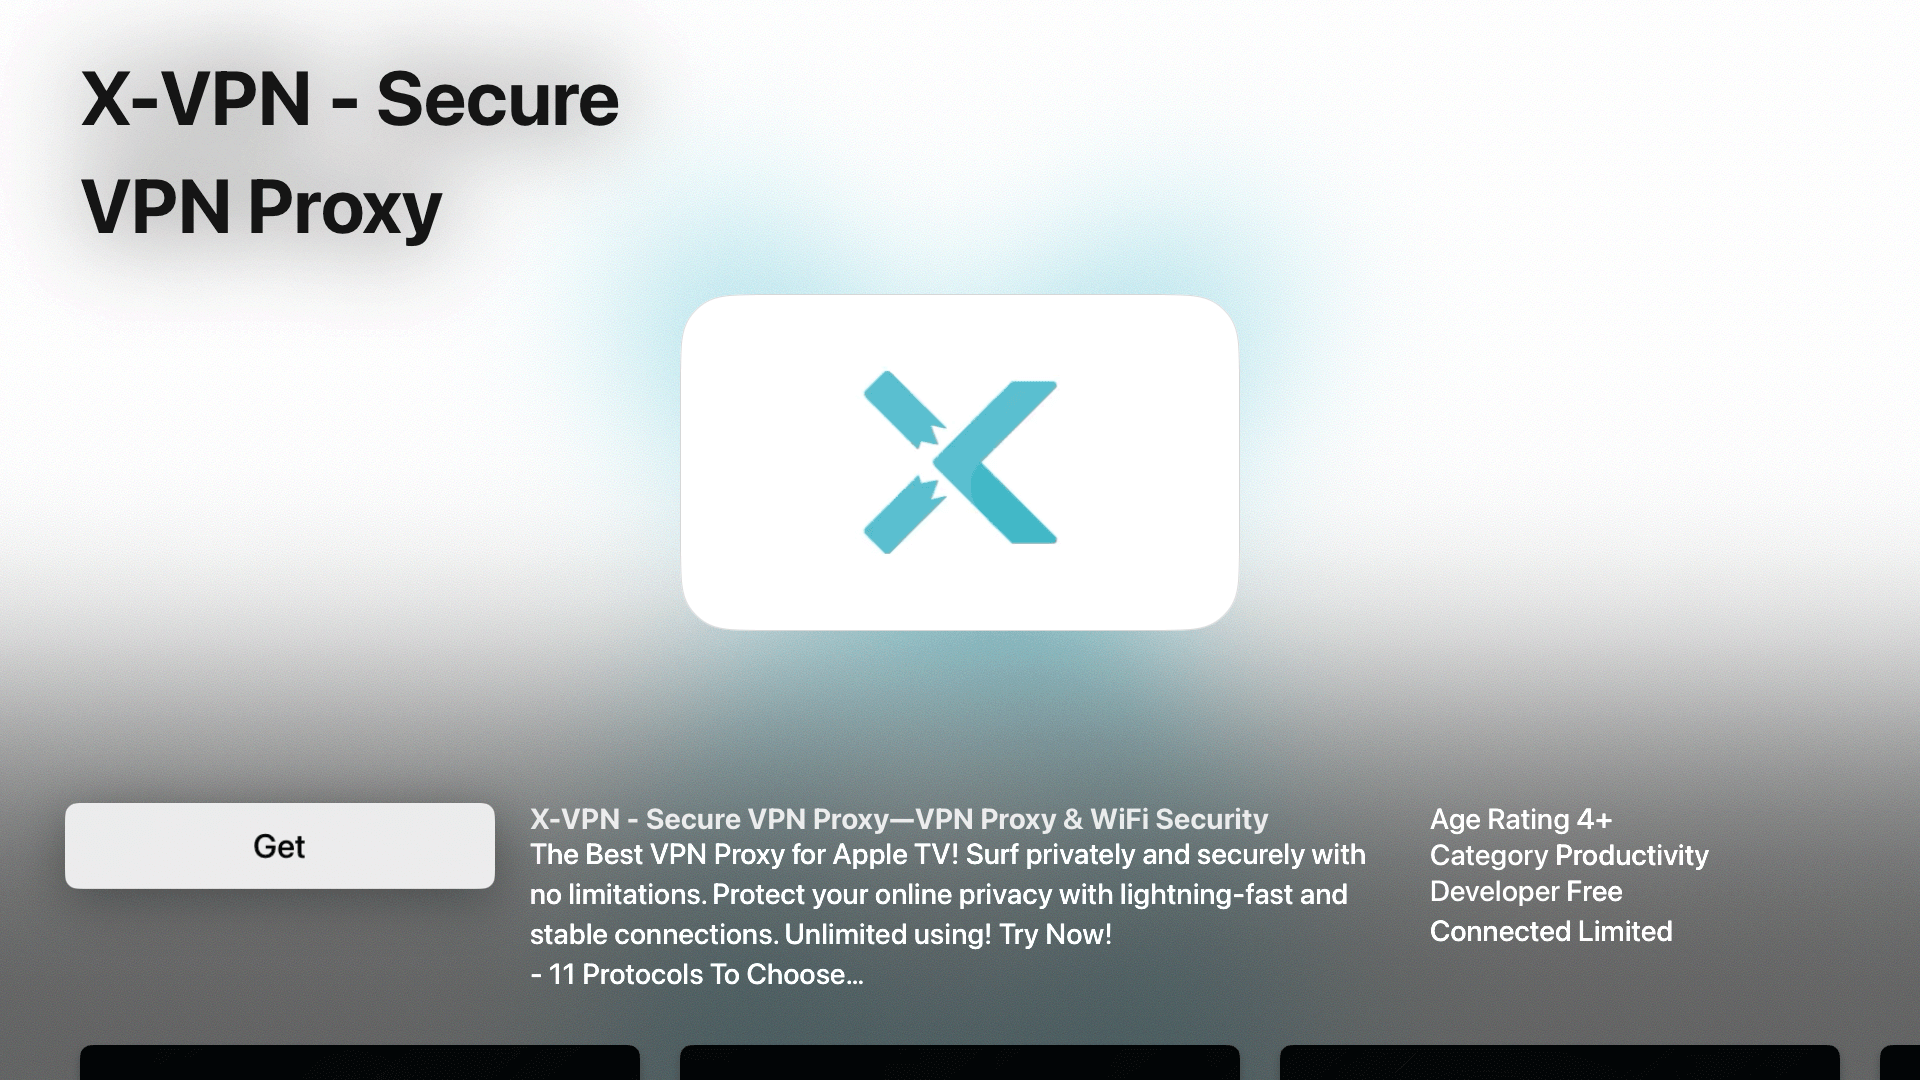
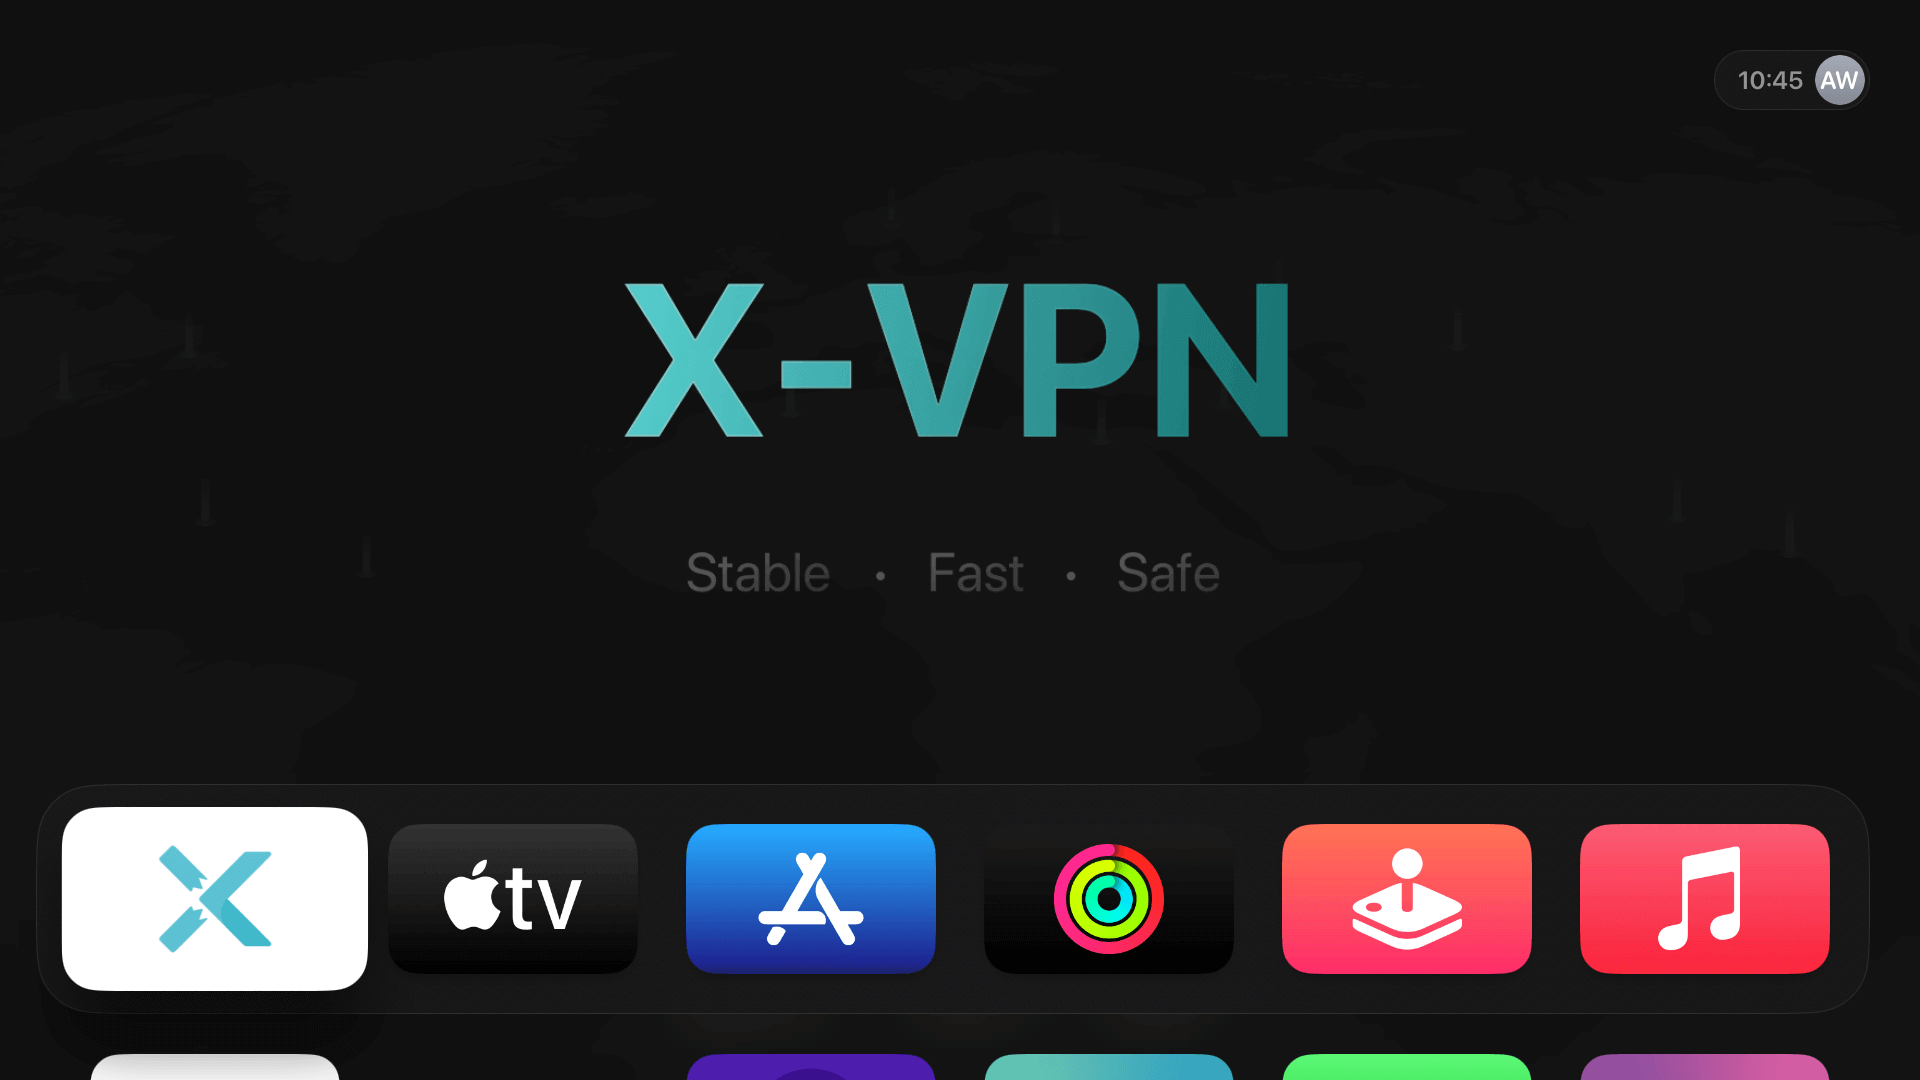
3. Download and install X-VPN. Once installed, click the button to open X-VPN
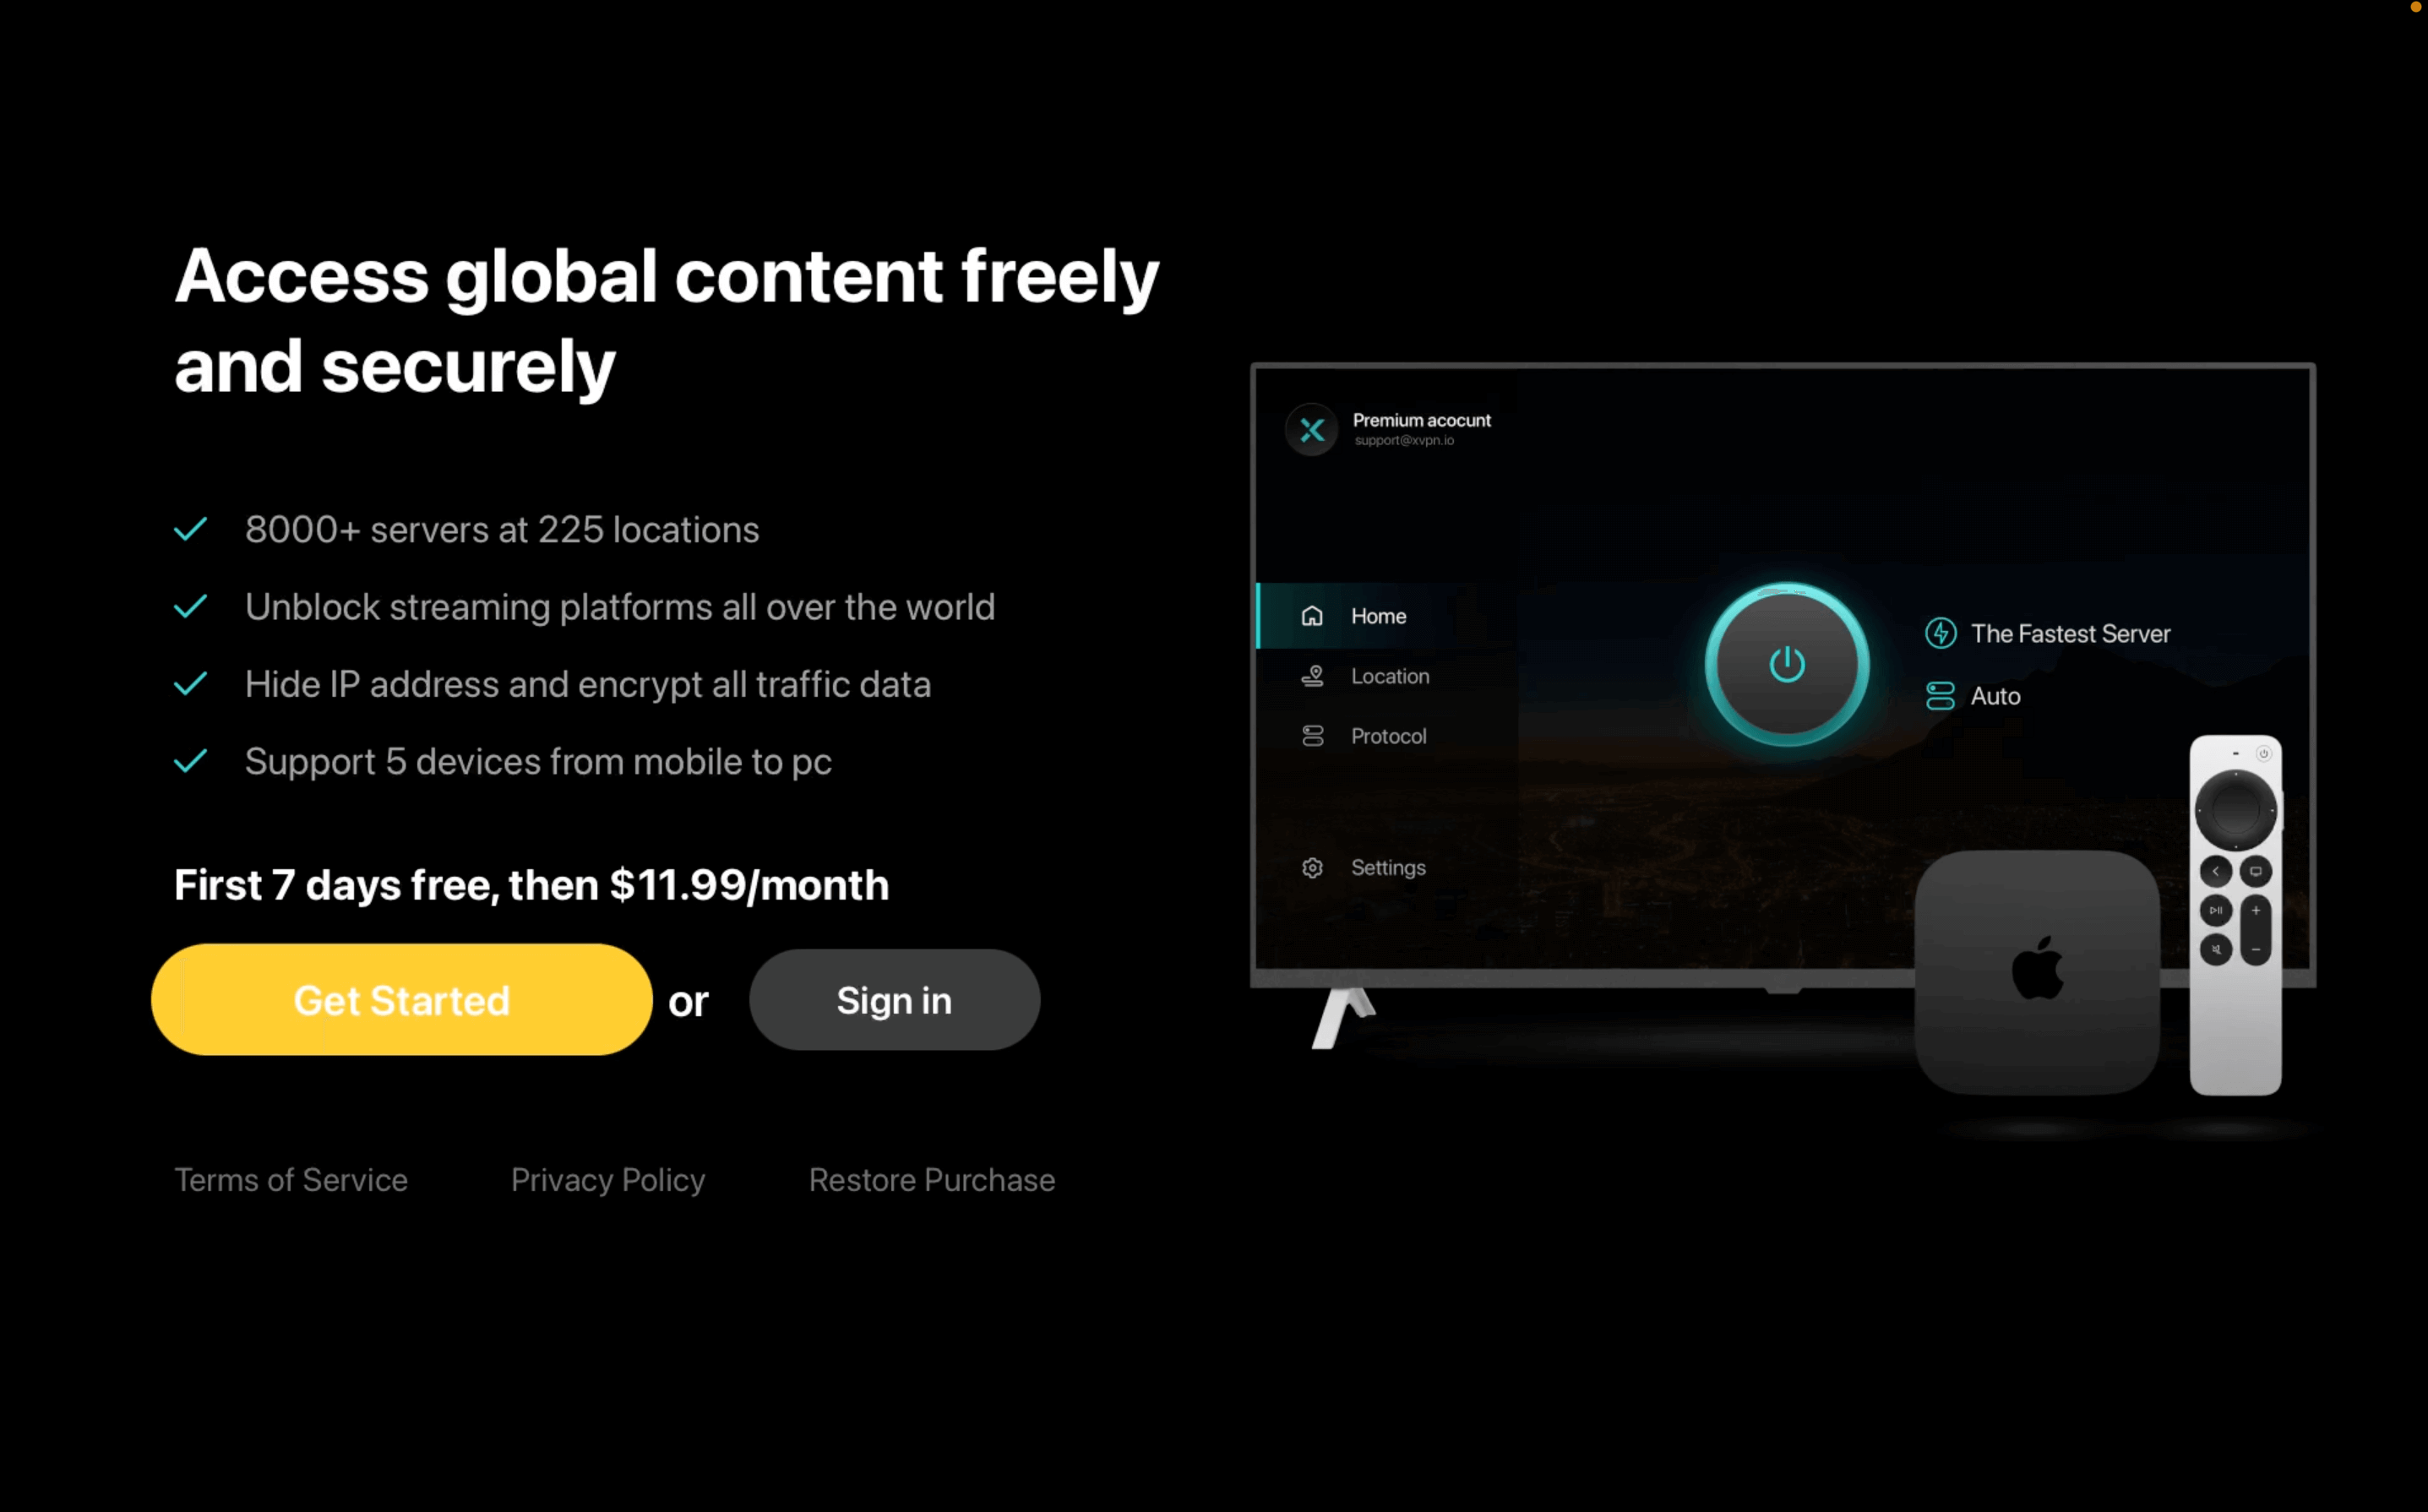
4. Start your 7-day free trial or sign in your X-VPN Premium account.
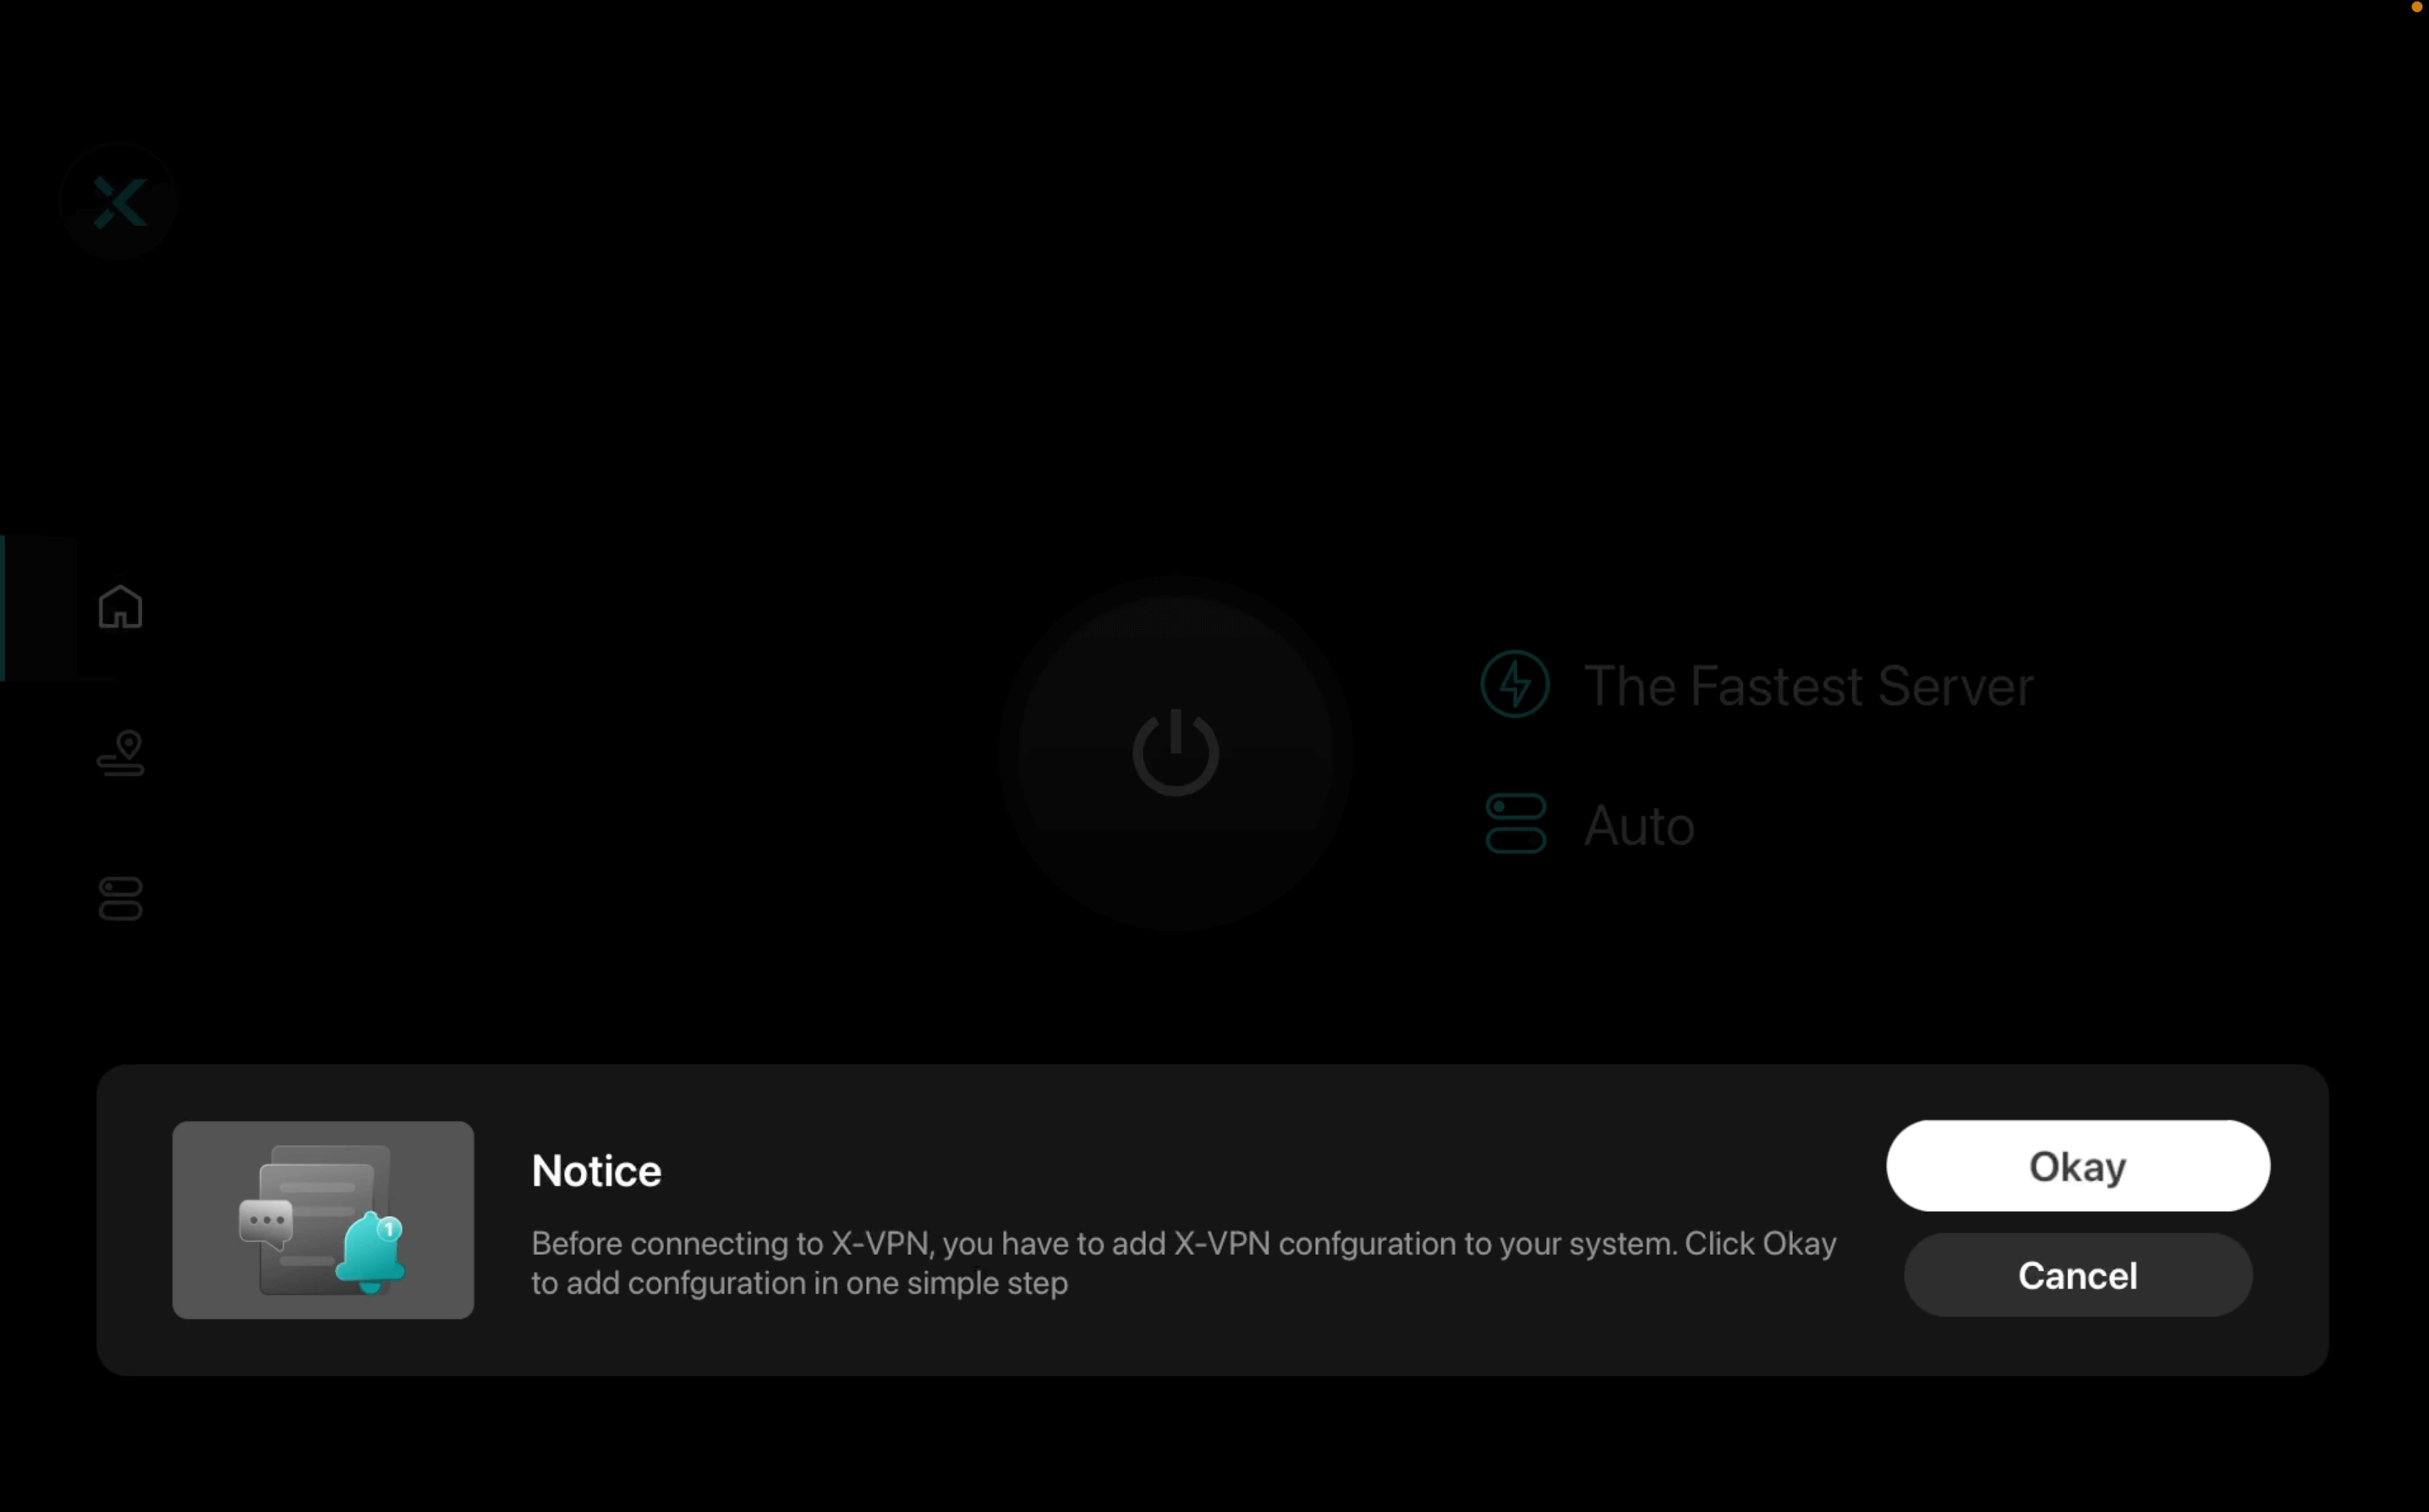
5. Once you're in the X-VPN app, simply click on the button to start the connection. A ' VPN Configuration ' pop-up will appear the first time you click the 'Connect' button. Simply click 'Okay' to continue.
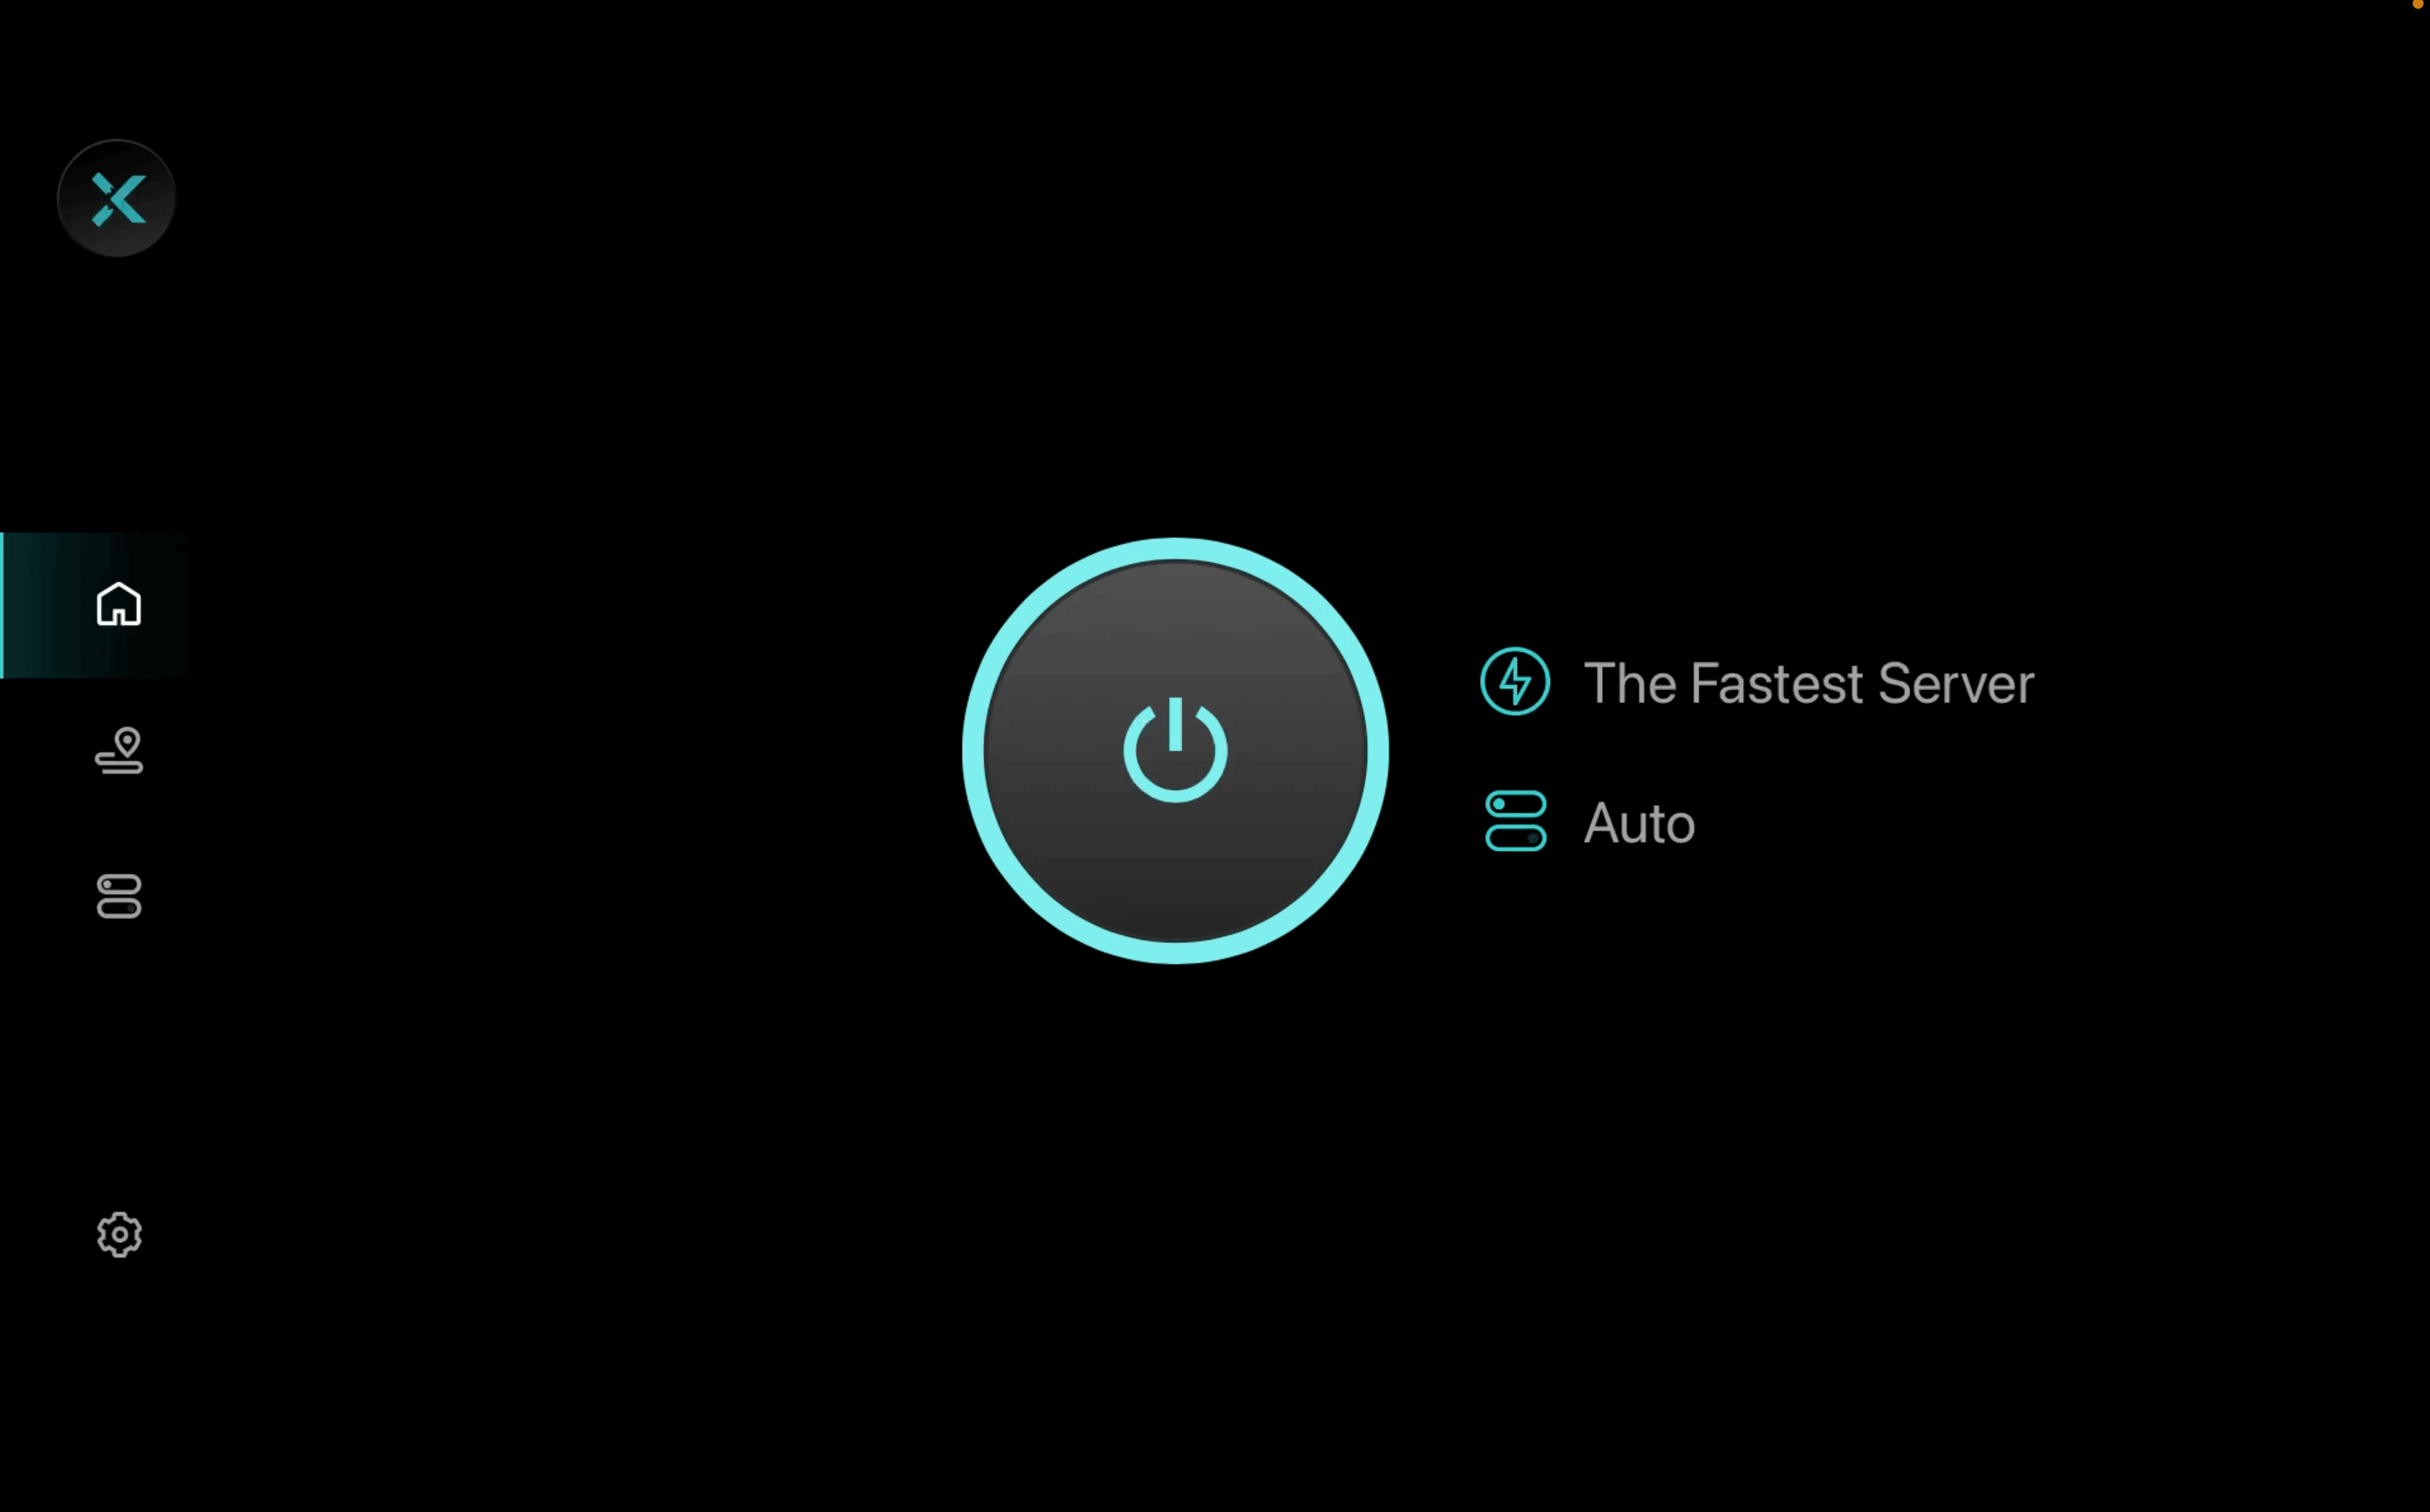
6. You are all set now!
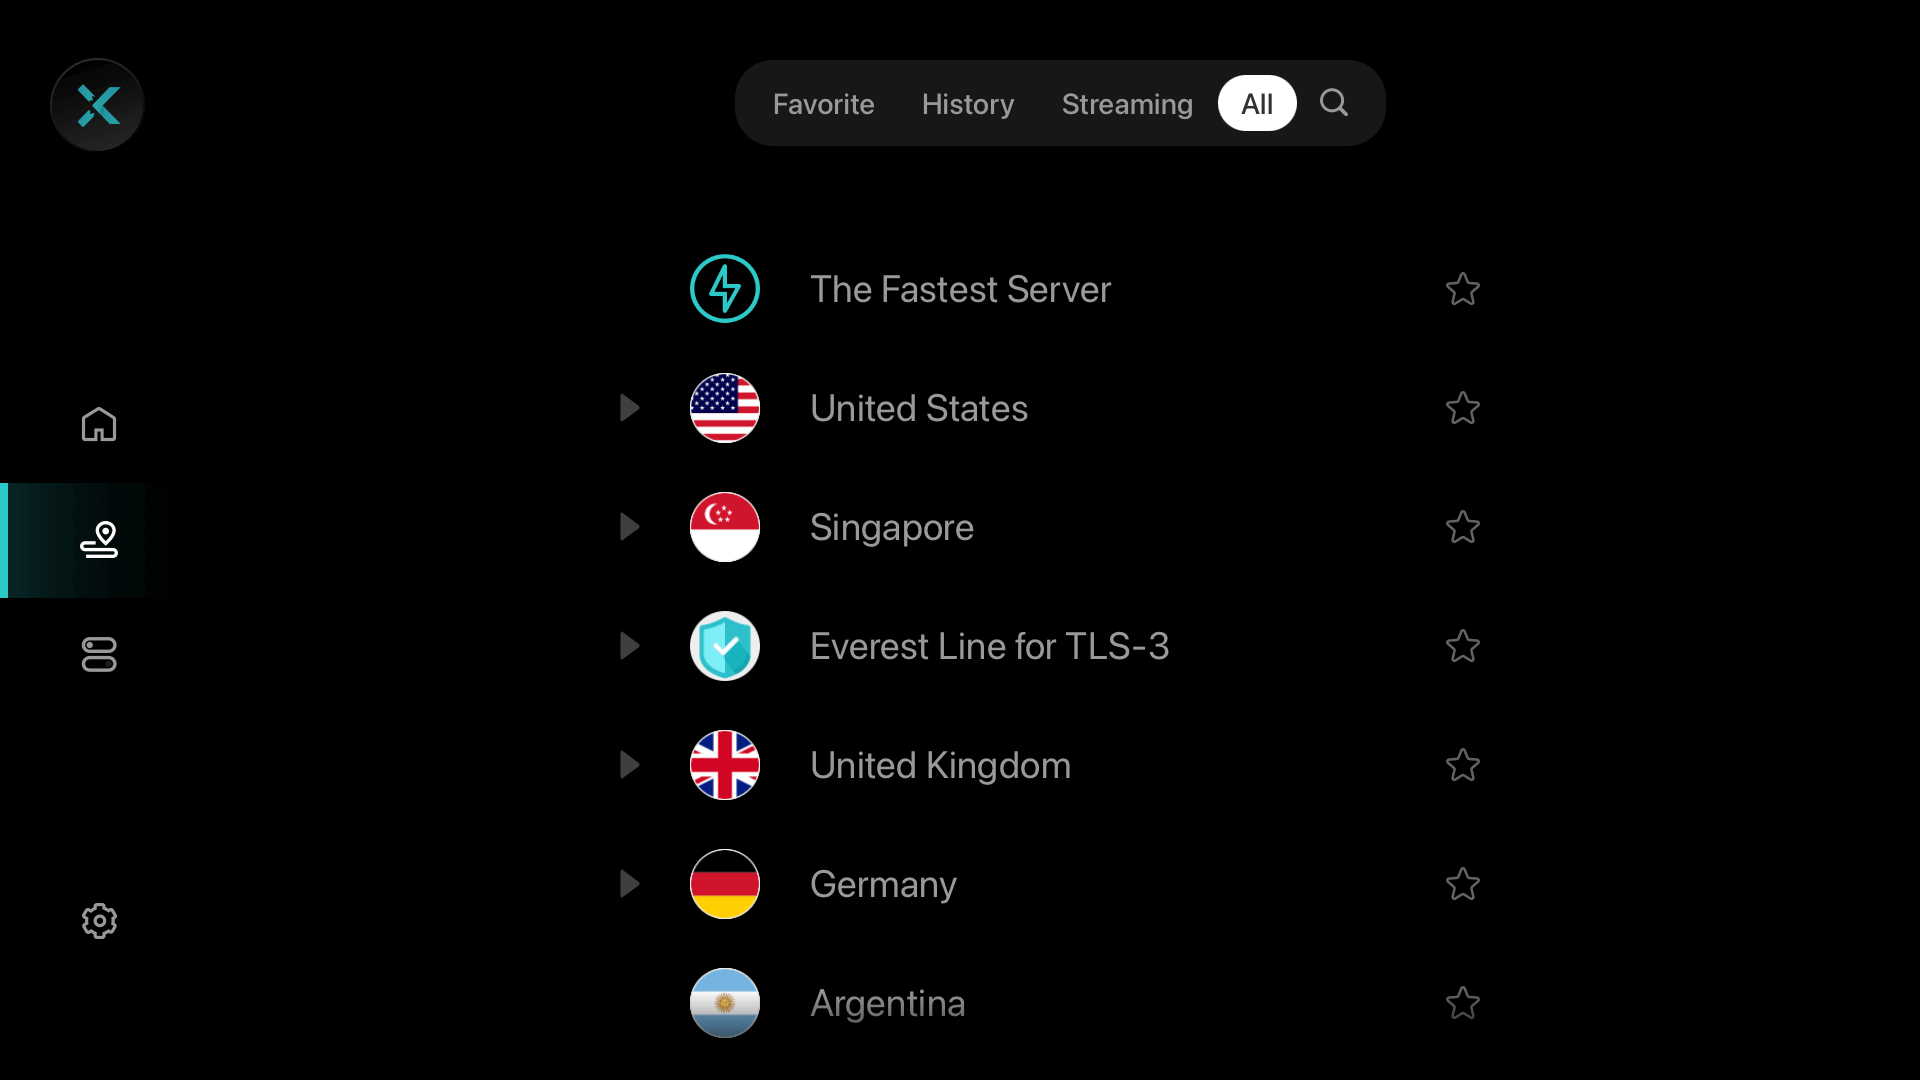
7. X-VPN allows you to choose servers on your Apple TV. With over 8000 global servers in more than 65 regions, you have plenty of options to find the one that suits your needs. X-VPN also offers specific streaming servers for popular platforms like Netflix, Hulu, Amazon Prime Video, and more. Server List
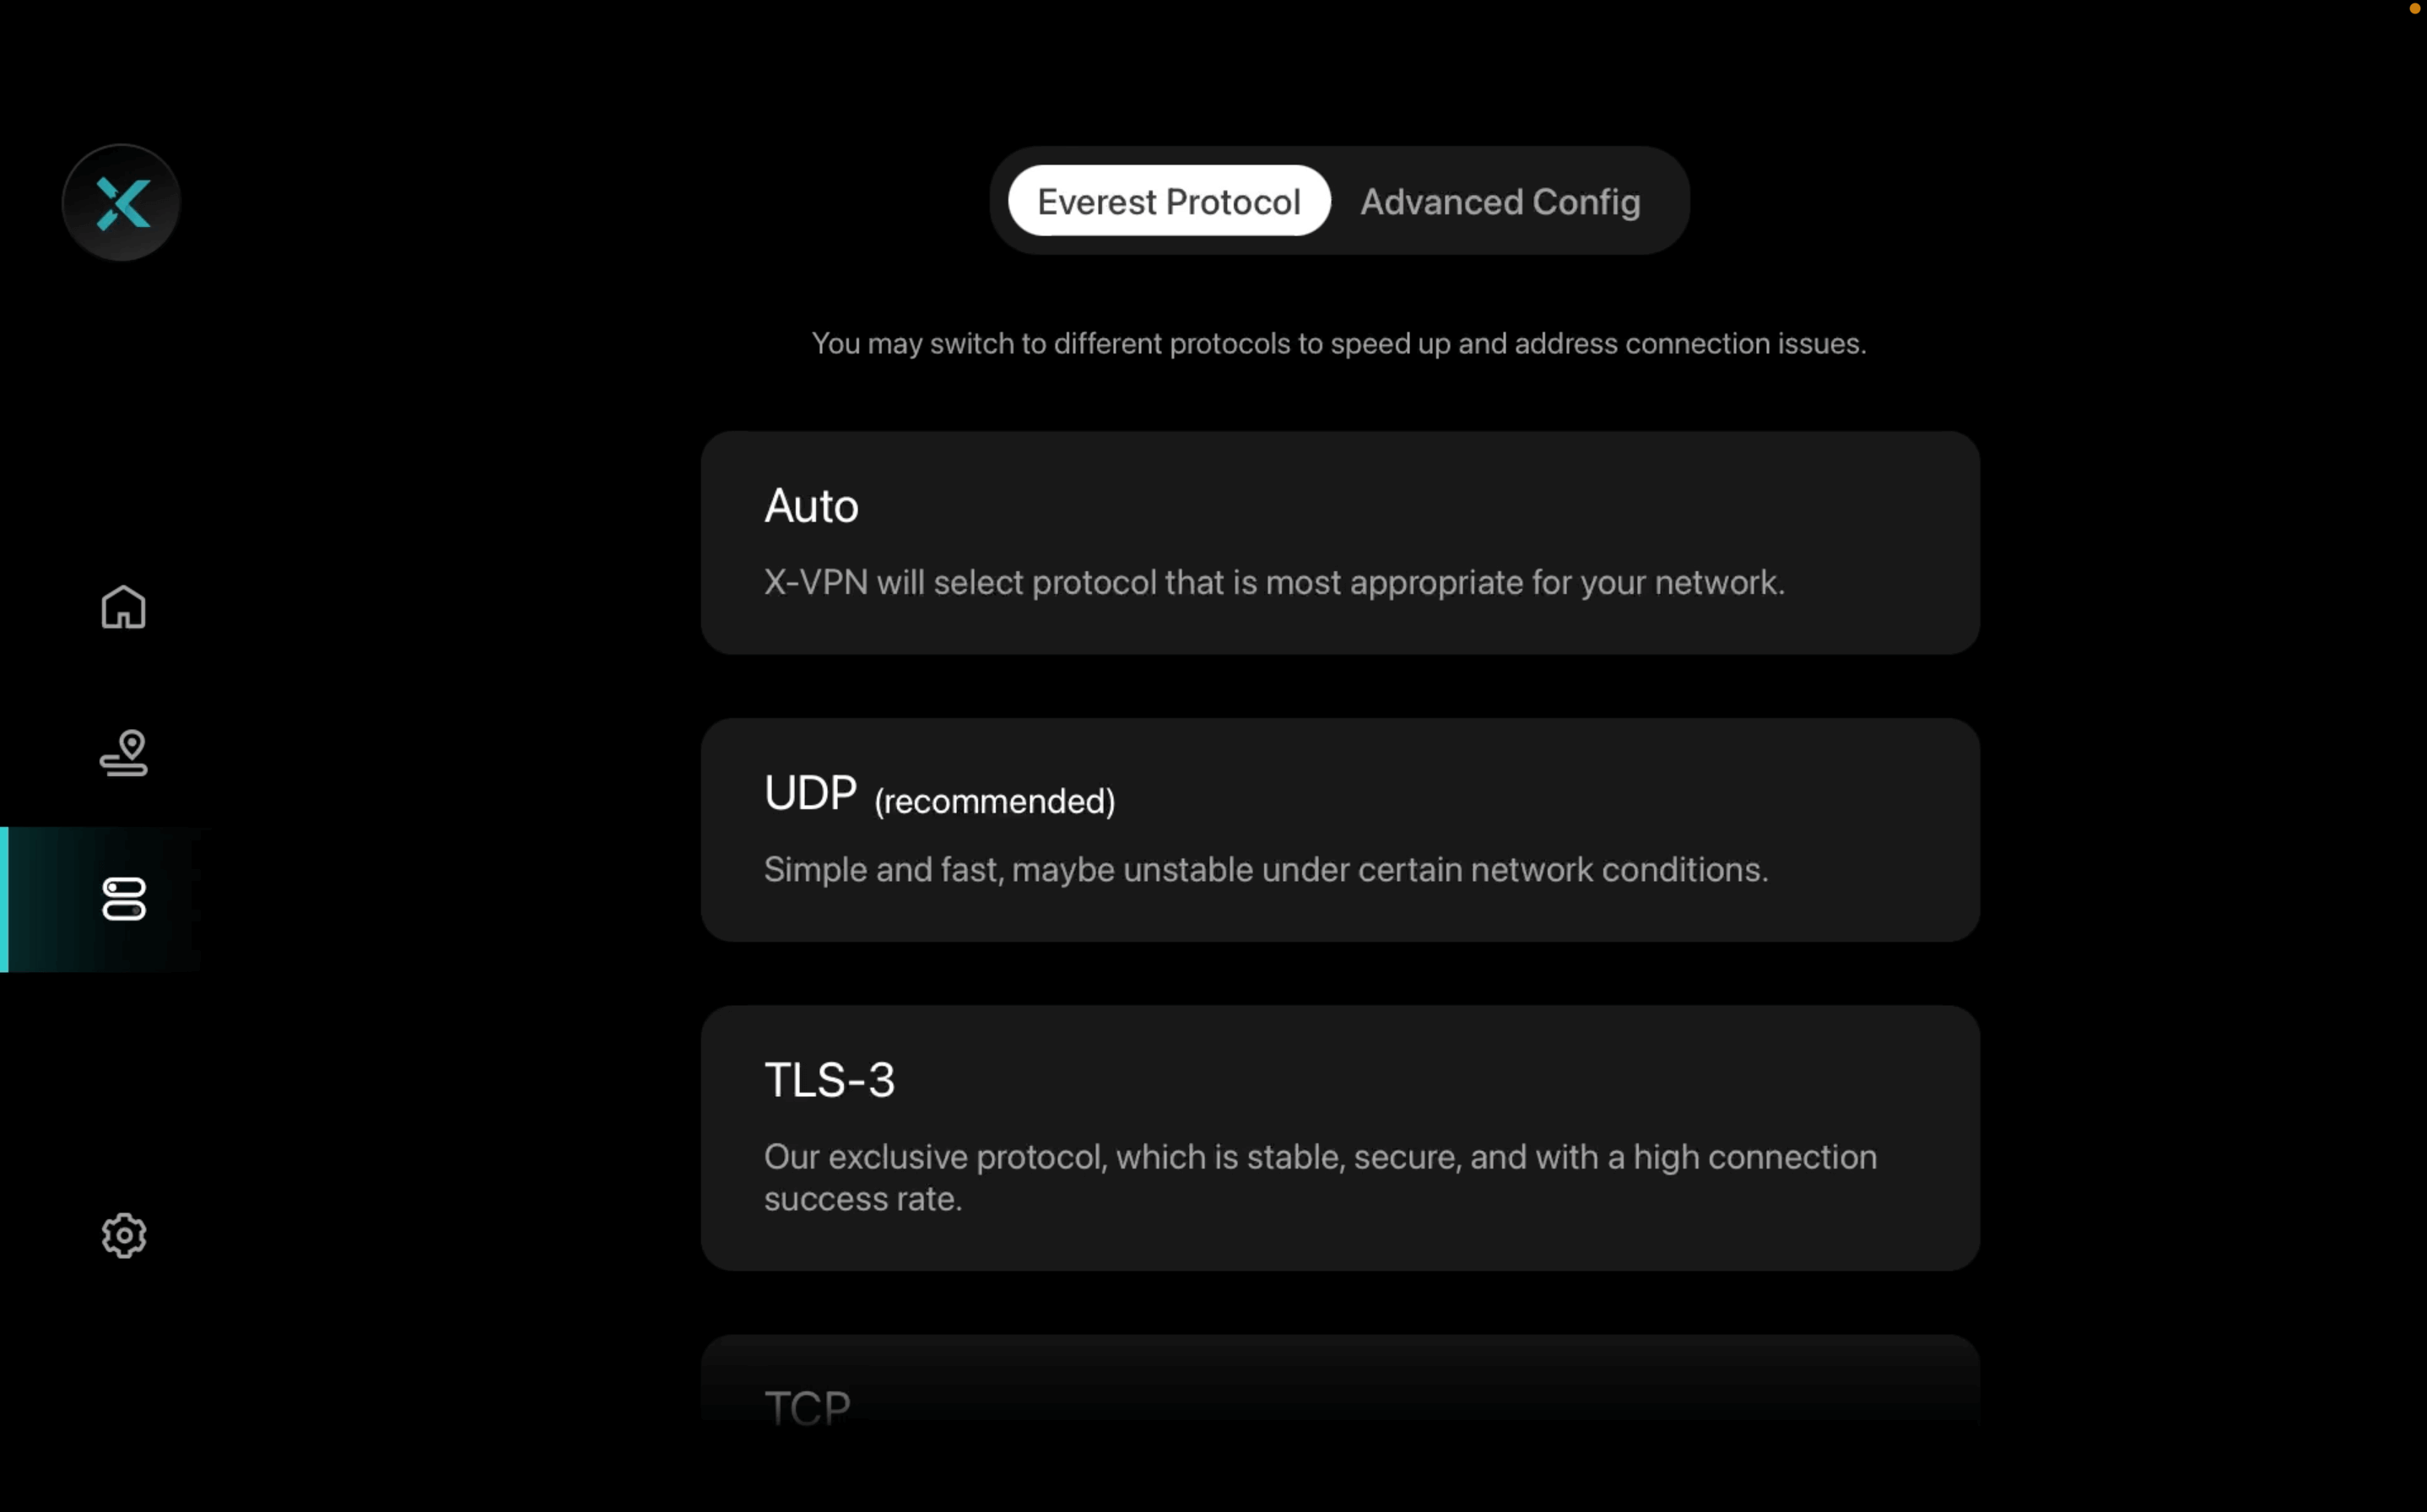
8. X-VPN has independently developed 11 protocols to adapt to the complex network environment around the world. With Apple TV, you can also select the protocol you prefer. We recommend choosing ‘Auto’, as X-VPN will match the most suitable protocol based on your network environment.
The above is all the content of the Apple TV tutorial. We hope it can be helpful to you. If you have any questions, please contact our Live Chat.
Was this article helpful?
Thanks for your feedback!
Why wasn't this article helpful?