What Is a Passkey and How to Use It with X-VPN
Latest edited on 2026-11-20
What Is a Passkey?
Want to sign in to X-VPN without typing a password? A passkey lets you use Face ID, your fingerprint, or your device's screen lock to access your account quickly and securely.
This guide explains what passkeys are, how they work, and how to create, use, and manage them in X-VPN on iOS and Android.
What Is a Passkey?
A passkey is a secure way to sign in without typing a password. Instead, you can use Face ID, your fingerprint, or your device passcode to confirm your identity.
Passkeys use two digital keys to protect your account:
- Public key: Stored on X-VPN's servers to verify your identity.
- Private key: Kept securely on your device or in your password manager. It's never shared with X-VPN.
Note: A public key is not your personal information. It's a digital key used to verify your sign-in and can't be used to access your account on its own.
When you sign in, your device uses the private key to confirm it's you without sharing it.
Why use a passkey?
- Faster sign-ins: Sign in without typing or remembering a password.
- Better security: Protect your account against phishing and password theft.
- Easy to use: Sign in with the Face ID, fingerprint, or screen lock you already use on your device.
How to Use a Passkey on iOS & Android
You can create a passkey in the X-VPN app on iOS and Android devices. There are three ways to set one up, depending on whether you already have an account.
Method 1: Sign in with a Passkey
New to X-VPN? You can create your account and passkey at the same time.
Step 1: Open X-VPN and go to the Sign in page. Use the suggested username or enter your own.
Step 2: Tap the Passkey icon.
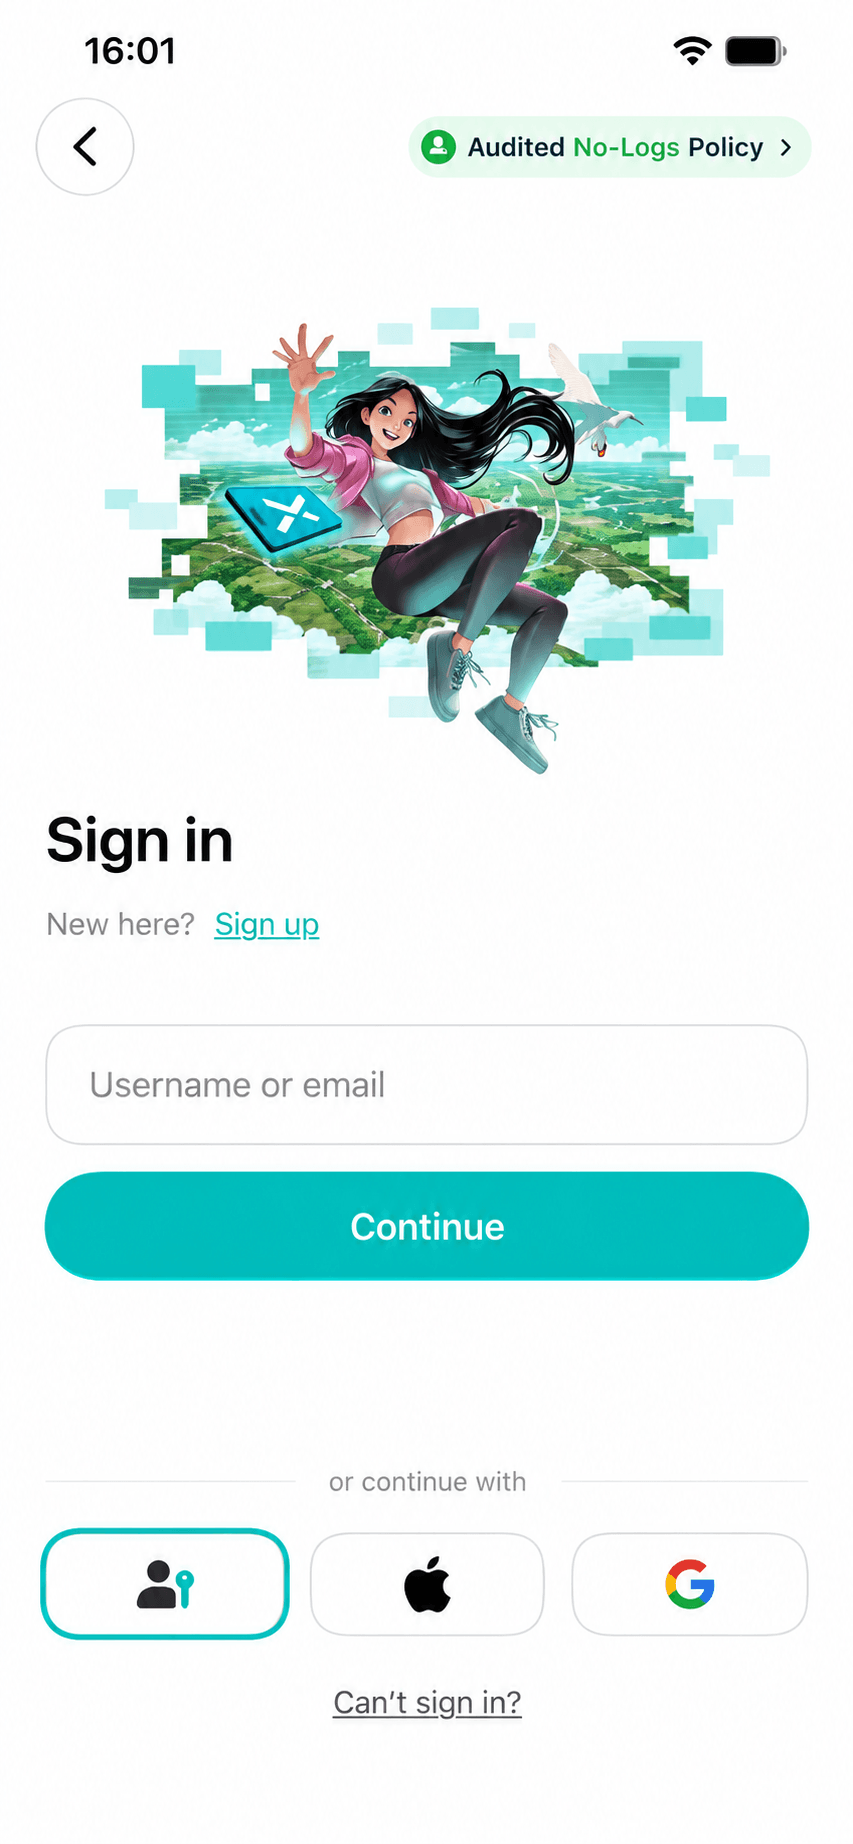
Step 3: When the passkey window appears, confirm with Face ID, your fingerprint, or your device's screen lock.
Step 4: Your passkey and X-VPN account are created, and you'll be signed in automatically.
Method 2: Create a Passkey After Signing Up
If you sign up with a username and password, X-VPN will give you the option to create a passkey right after registration.
Step 1: Sign up for X-VPN with a username and password.
Step 2: After signing up, you'll see the Create a passkey page. Then, tap Create a passkey.
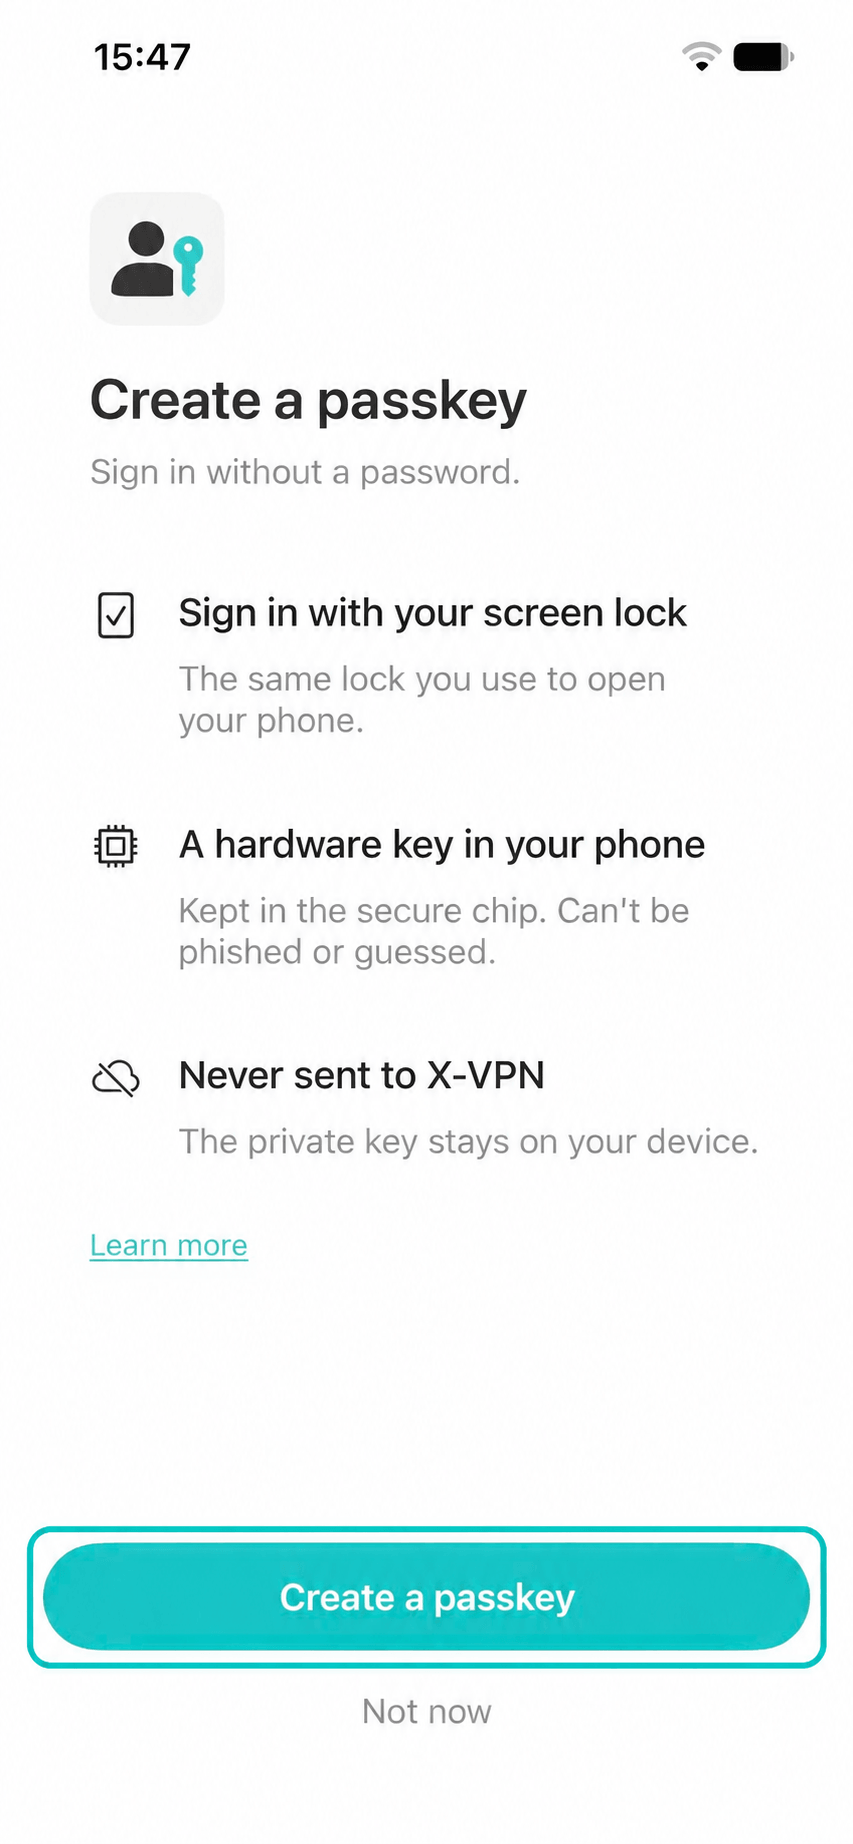
Step 3: Confirm with Face ID, your fingerprint, or your device's screen lock to finish.
Step 4: Your passkey is ready to use.
Tip: Want to do this later? Tap Not now. You can add a passkey anytime in Account & Security.
Method 3: Add a Passkey to an Existing Account
Already have an X-VPN account? You can add a passkey from your account settings.
Step 1: Go to Account & Security → Sign-in methods → Passkey.
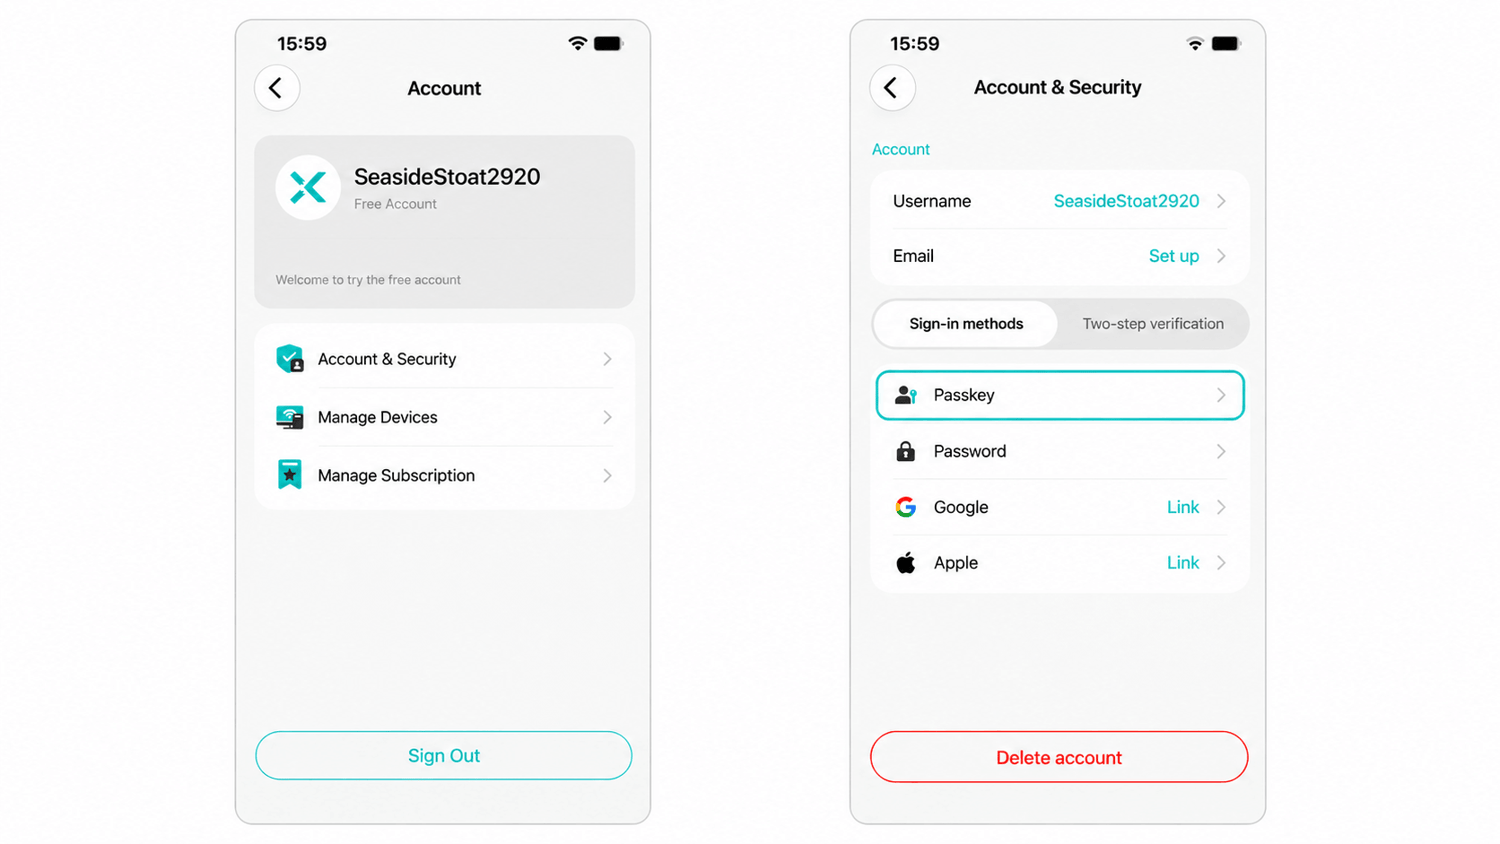
Step 2: Tap Add a passkey.
Step 3: If you've turned on two-step verification, confirm it's you with the method shown on screen (an email code, an existing passkey, or your authenticator app). If two-step verification is off, this step is skipped.
Step 4: Confirm with Face ID, your fingerprint, or your device's screen lock.
Step 5: Once you see Passkey created, your new passkey is ready to use.
Note: You can add up to 5 passkeys to one X-VPN account.
Using a Passkey from Another Device
You can sign in with another device that has your passkey saved. Follow the on-screen prompts until a QR code appears, then scan it with the other device and confirm there. If the QR code expires, tap Refresh.
Note: On Android, you can also select Use a password from the sign-in options to log in with your account password.
How to Manage or Remove a Passkey
You can view and remove your saved passkeys anytime in X-VPN's account settings. Follow these steps to manage them:
Step 1: Go to Account & Security → Sign-in methods → Passkey to see your passkeys, where they're saved, and when they were created.
Step 2: Select the passkey you want to delete, tap Remove, and confirm.
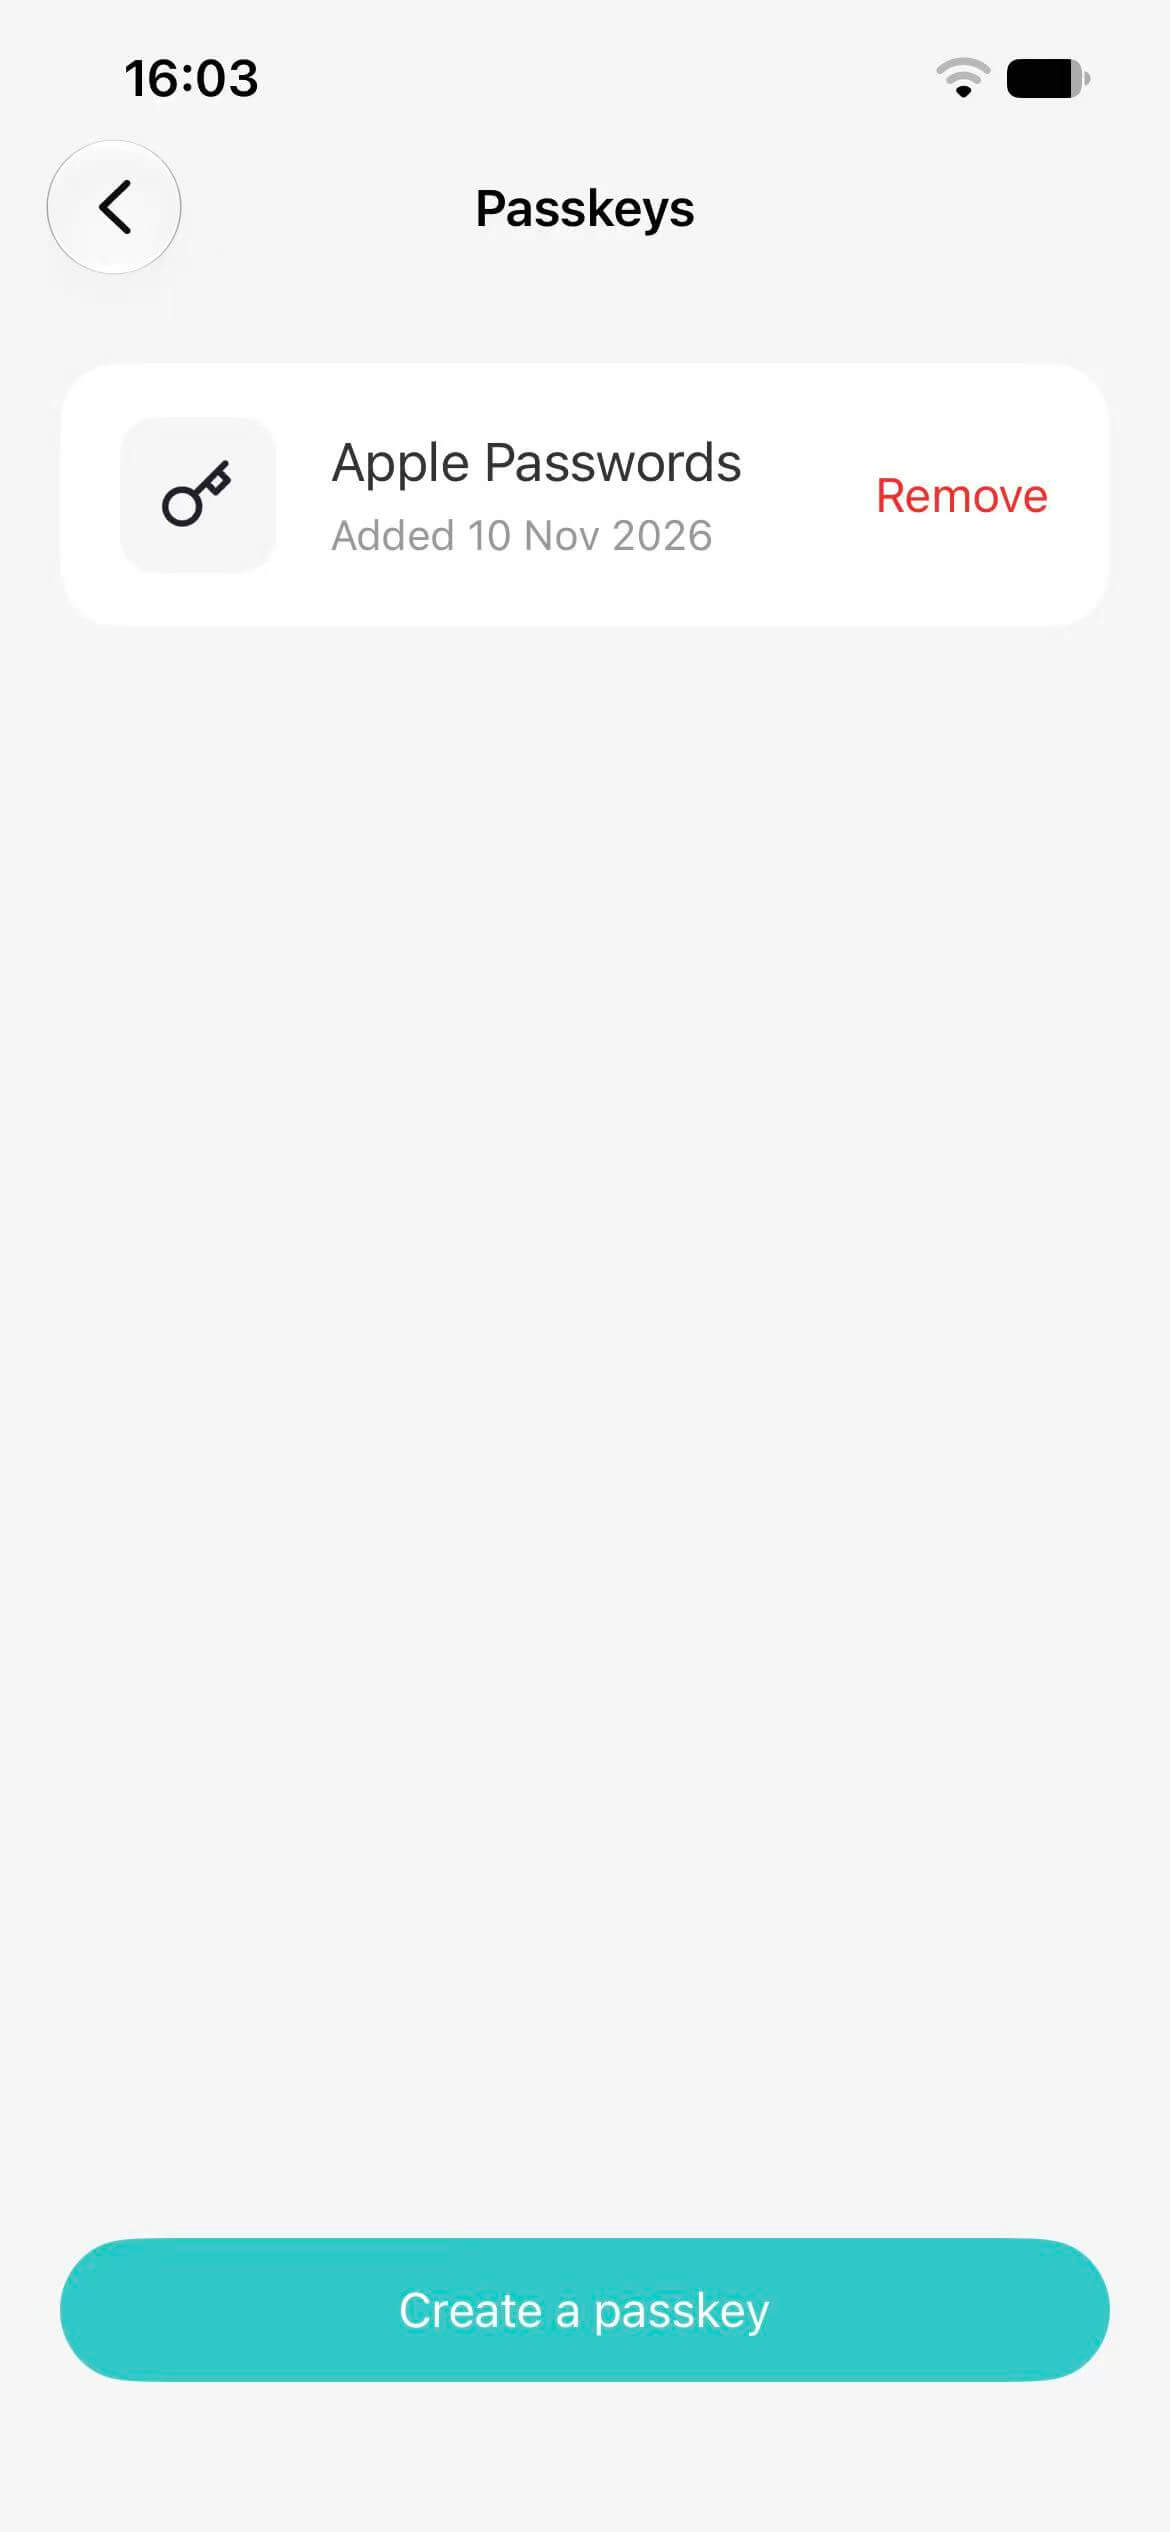
Step 3: You'll see Passkey deleted when the removal is complete.
Important Notes About Removing a Passkey
Before removing a passkey, here are two things you should know:
- Your passkey stays in your password manager: Once removed from X-VPN, it can no longer be used to sign in. However, it will still appear in iCloud Keychain, Google Password Manager, or your chosen password manager. You can delete it separately in your phone's settings.
- Your other devices will be signed out of X-VPN: The phone you're using to remove the passkey stays signed in.
Was this article helpful?
Thanks for your feedback!
Why wasn't this article helpful?